

“Maya tools for repetitive / complicated grooming tasks”
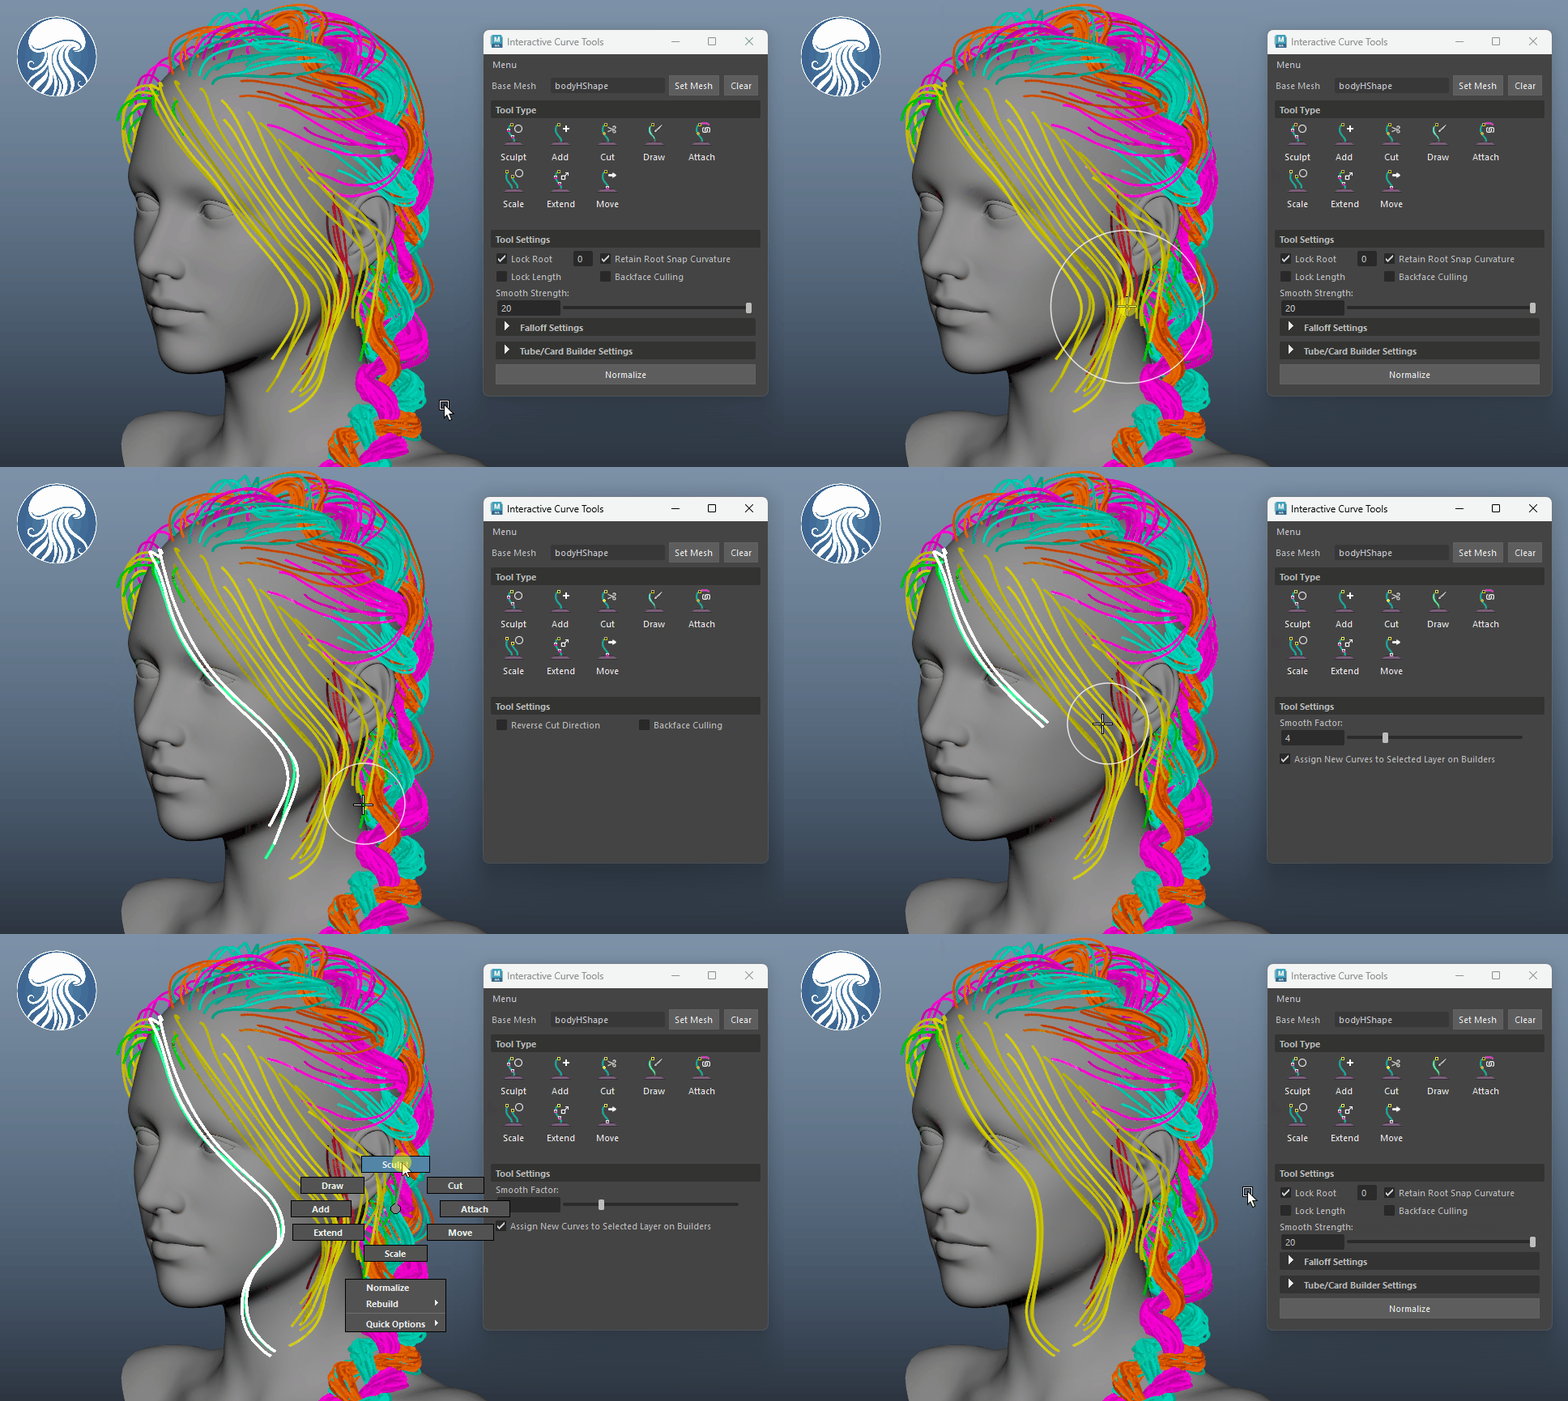
Interactive Curve Tool
-
Sculpt, add, cut, draw, attach, scale, extend, and move curves directly in the viewport with an interactive brush-based workflow.
-
This lets artists shape and refine curves in real time without leaving the viewport or jumping through multiple tools and it's fully compatible with all of our builders (Tube, Card, Braid/Curl Builders) .
Hair Tube/Card Builder
-
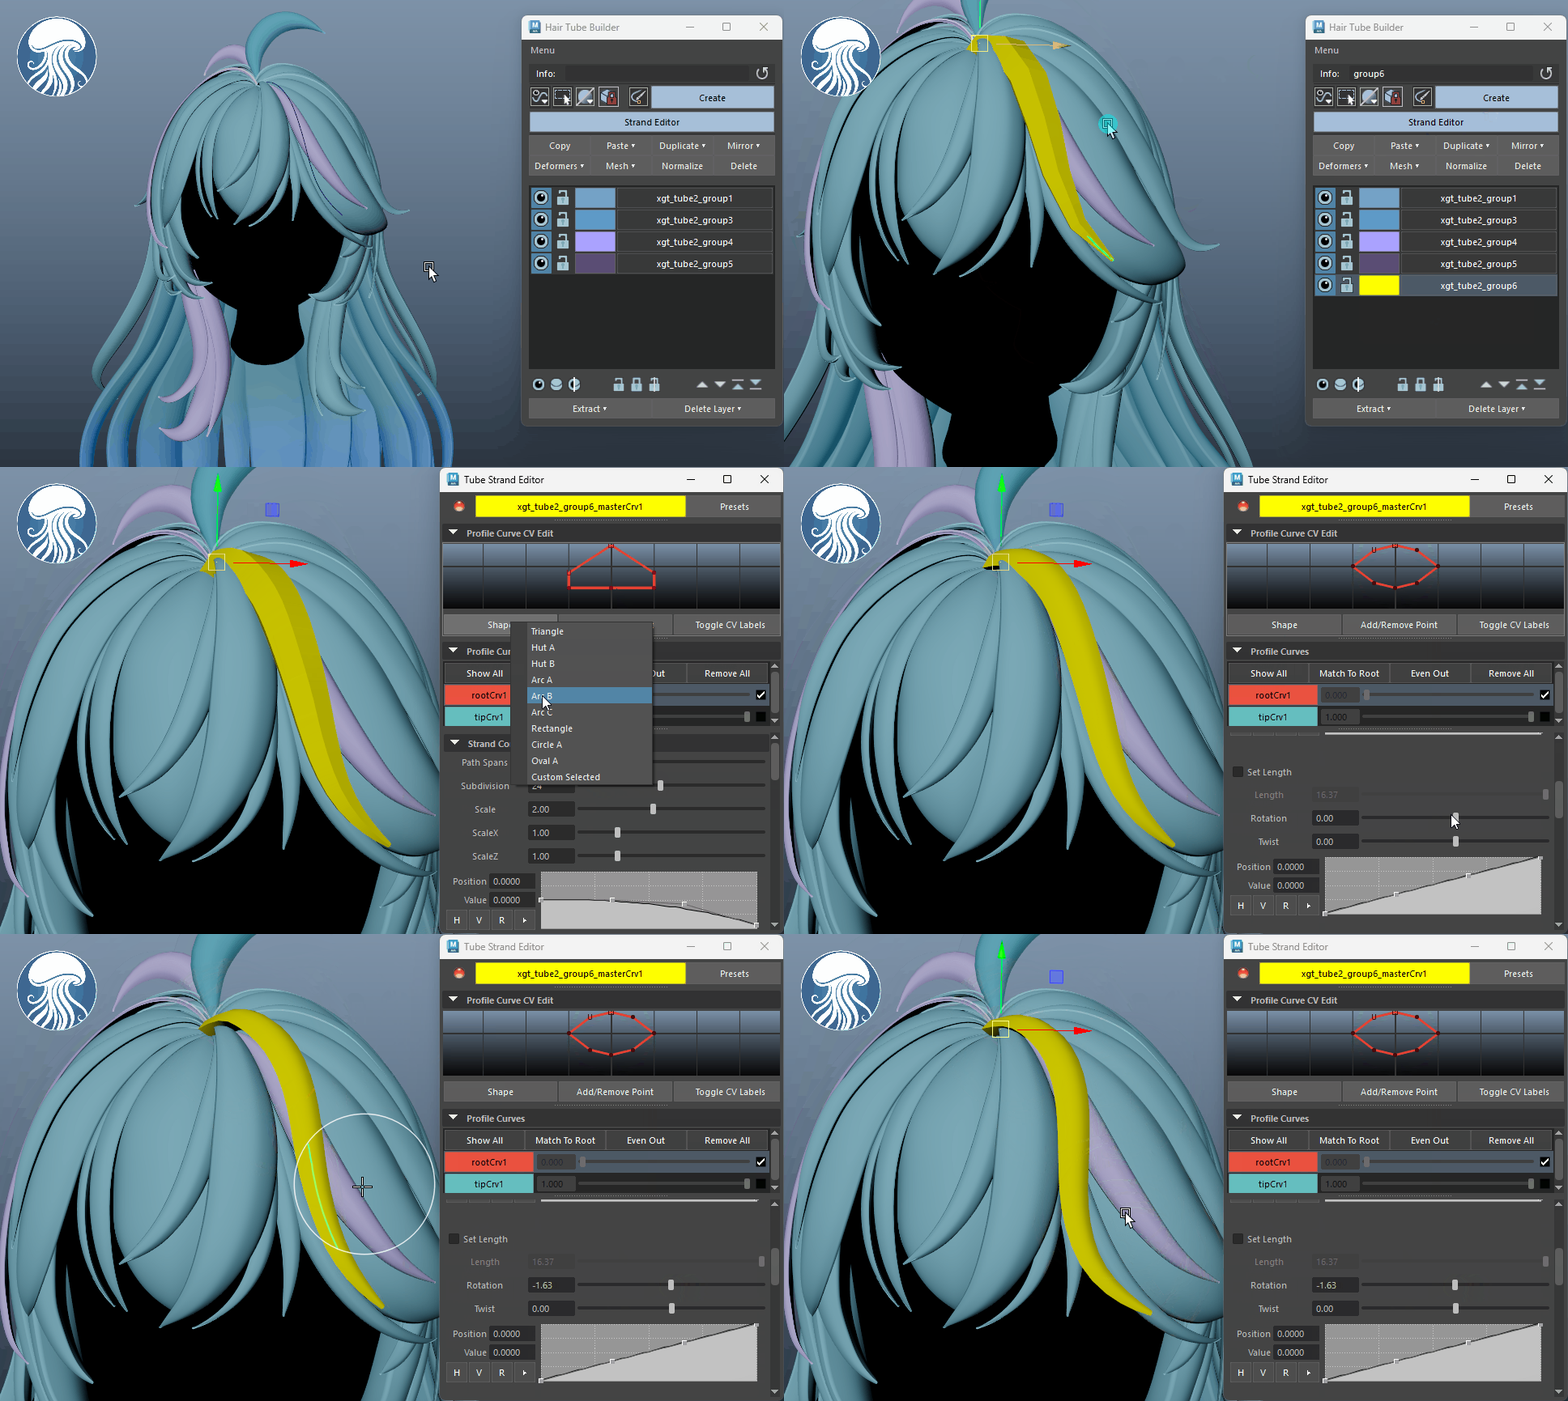
Our latest invention, curve-based tube/card builders. It’s fully procedural, so you can keep editing and refining strand tubes/cards without worrying about losing history.
-
It includes powerful features like layer management, editable profile curves, middle profile curves, profile shape editing, crease controls, automatic UVs, ability to save/load presets, and even Paint FX drawing to create tubes quickly. And with our Interactive Curve Tools, the workflow becomes even faster and more intuitive.
Braid Builder
-
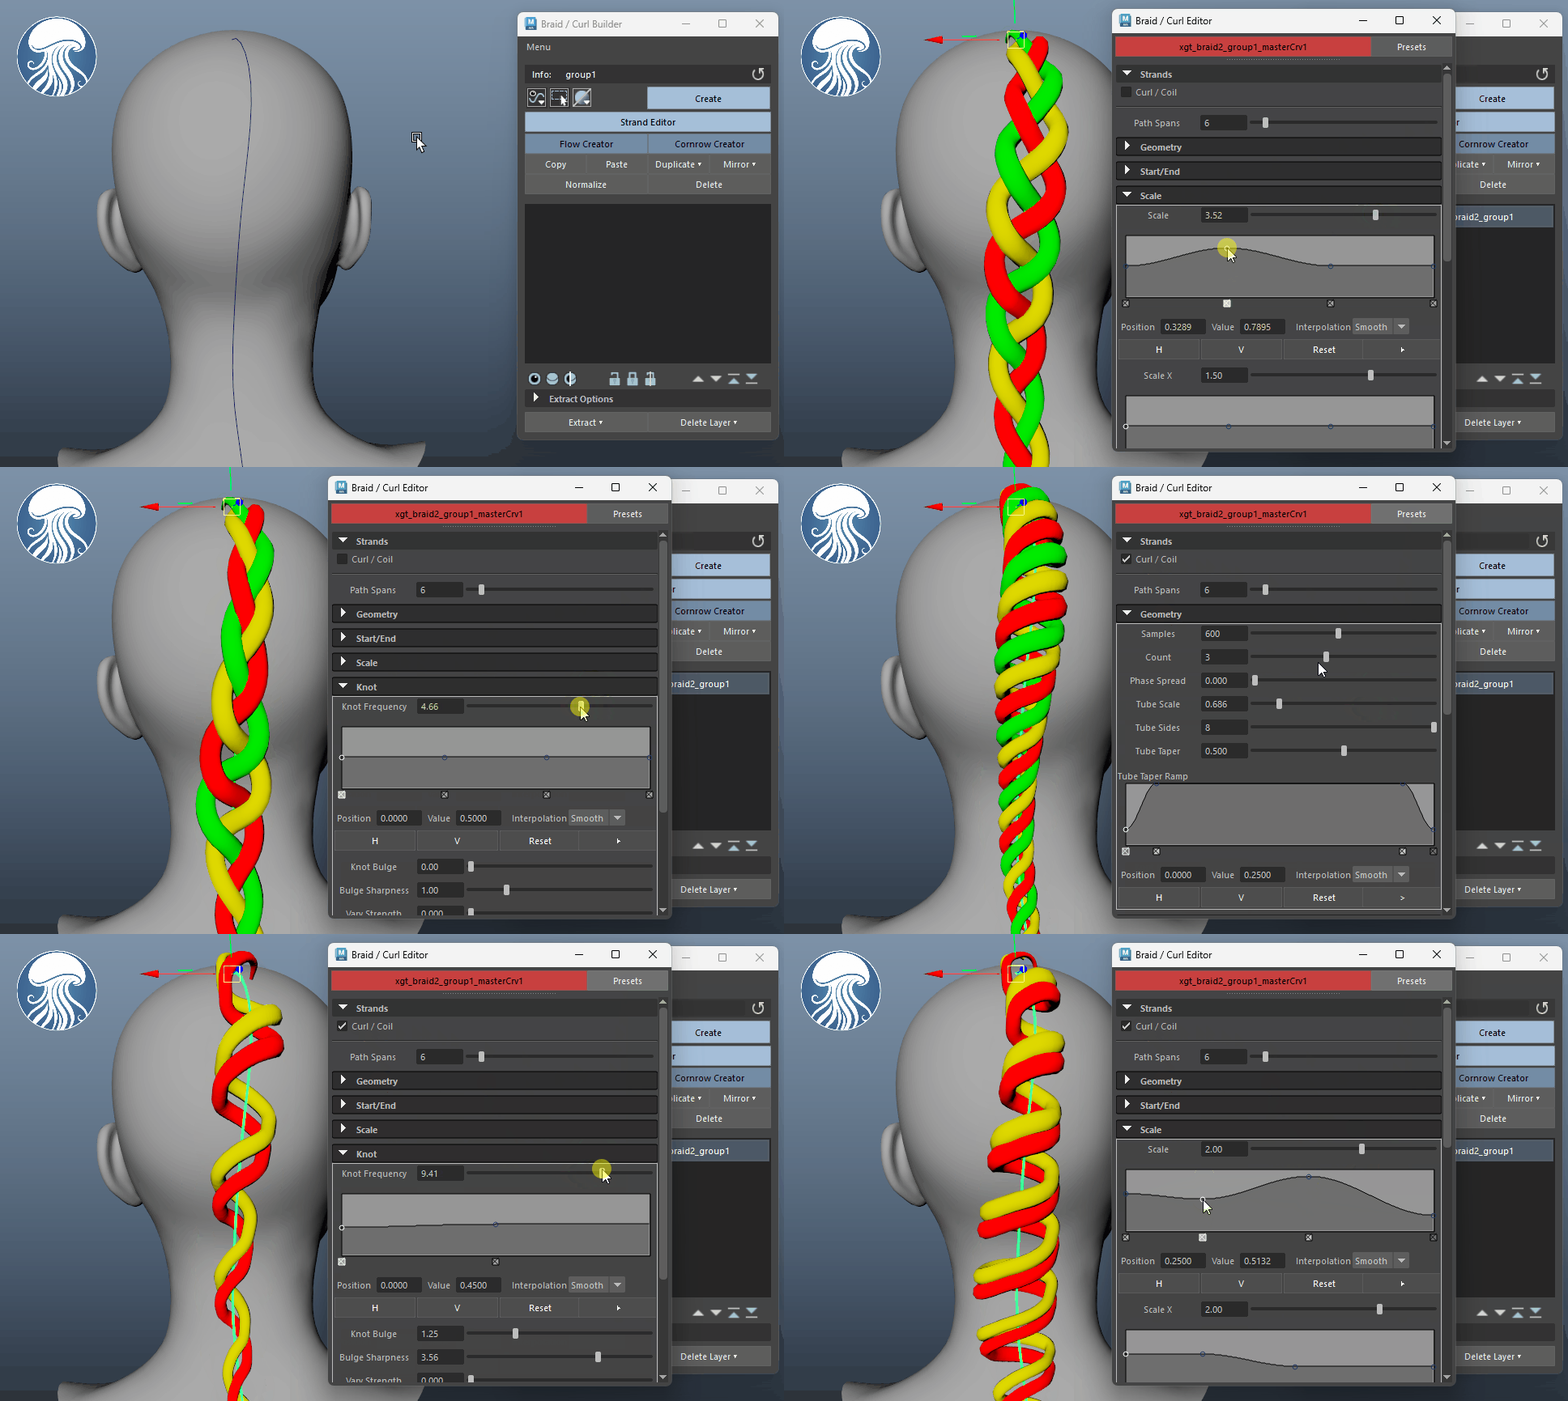
Braids are time-consuming to build by hand. With Groomer’s Tool’s Braid Builder, you simply provide a central path curve, and the tool generates a braid for you. No manual math or setup is required.
-
The braid is procedural, with plenty of controls for you to adjust the look with. The central curve is fully compatible with our Interactive Curve Tools.
-
Creating curly curves by hand can be slow and frustrating. Using our Braid Builder, curly curves can now be created easily with procedural workflow, just like our other Builders.
-
It converts a straight or gently shaped curve into curls (or coils, if you prefer), letting you adjust the look quickly while staying flexible.
-
It also supports generating flow curves, or cornrow curves for workflows like cornrows.
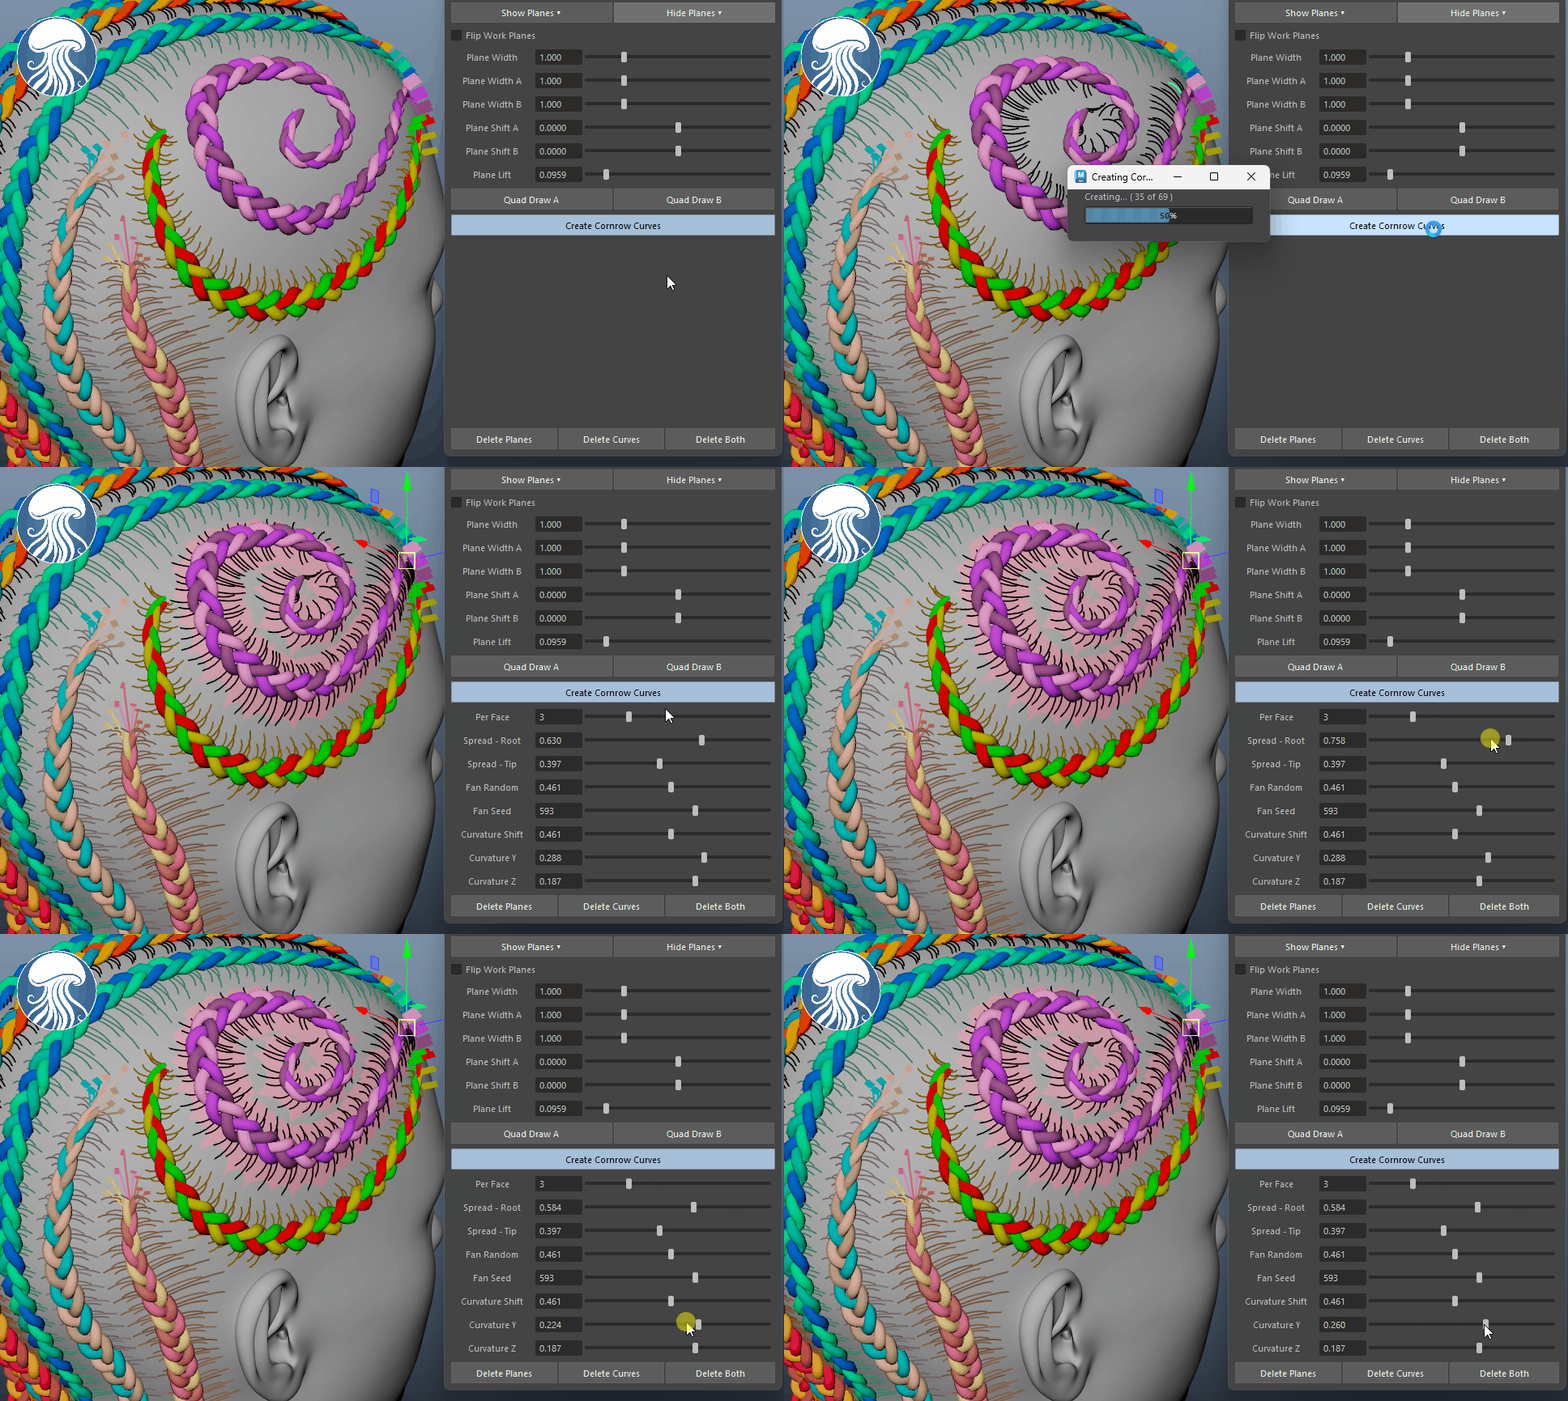
Braid Builder - Cornrows
-
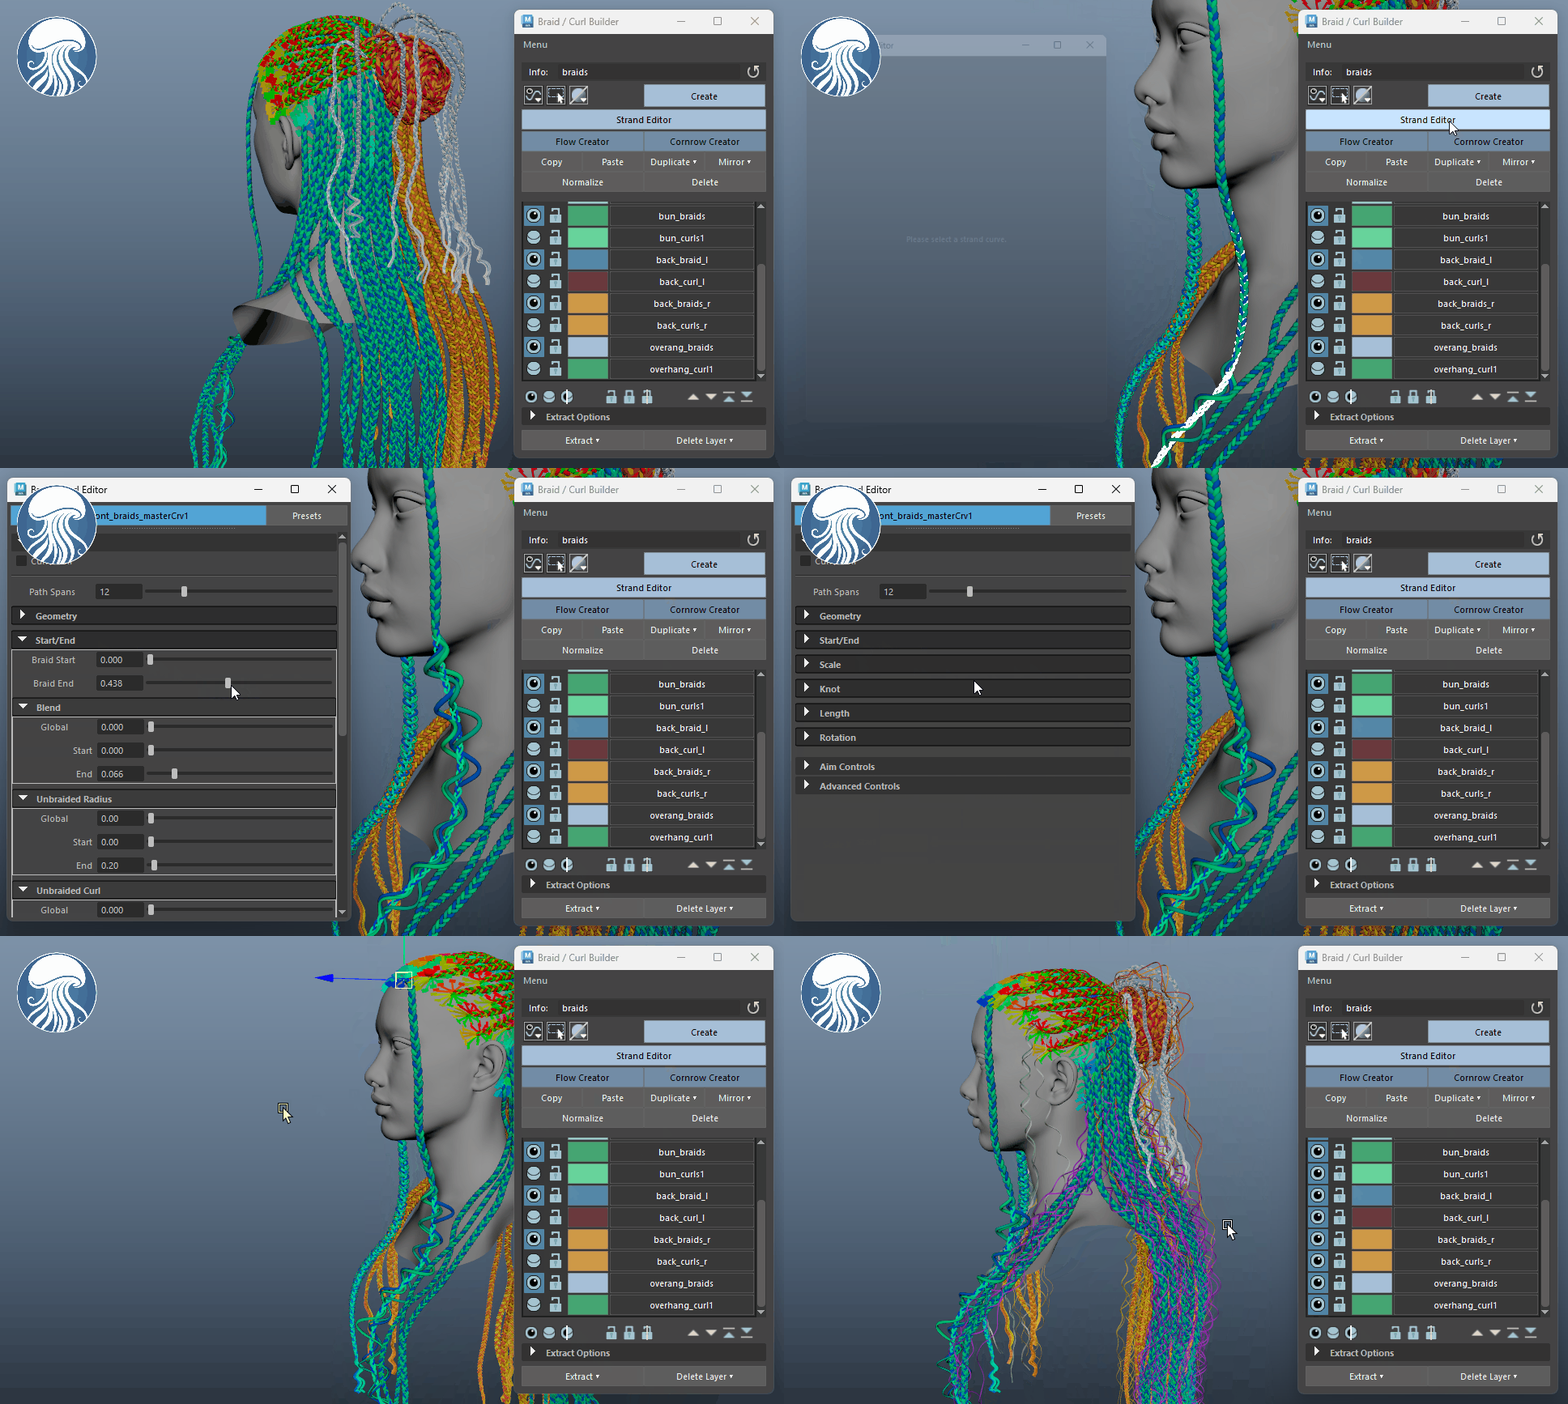
Creating the “side curves” for cornrows is much easier with Groomer’s Tool’s Braid Builder.
-
You can extract clean side curves directly from the central braid, snap them onto the scalp surface, and instantly get a usable set of side curves ready for further grooming in XGen.
Maya Curve Color Tool
-
Organize Maya curves into color layer system, allowing you to isolate layer, adjust thickness of curves, select the curves with ease for your edits.
-
Built in XGen Convert support. That means, you can edit the curves with all our Maya Tools such as Sculpt, Clump/Repel, Cut, Snap, etc. When you are done, with a button click, you can convert the curves directly into XGen guides.
-
This can a very fast and organized way to create guide curves because it allows you to move the roots, CVs/EVs of the curve directly.
-
Also supports exporting .fbx and .abc format.
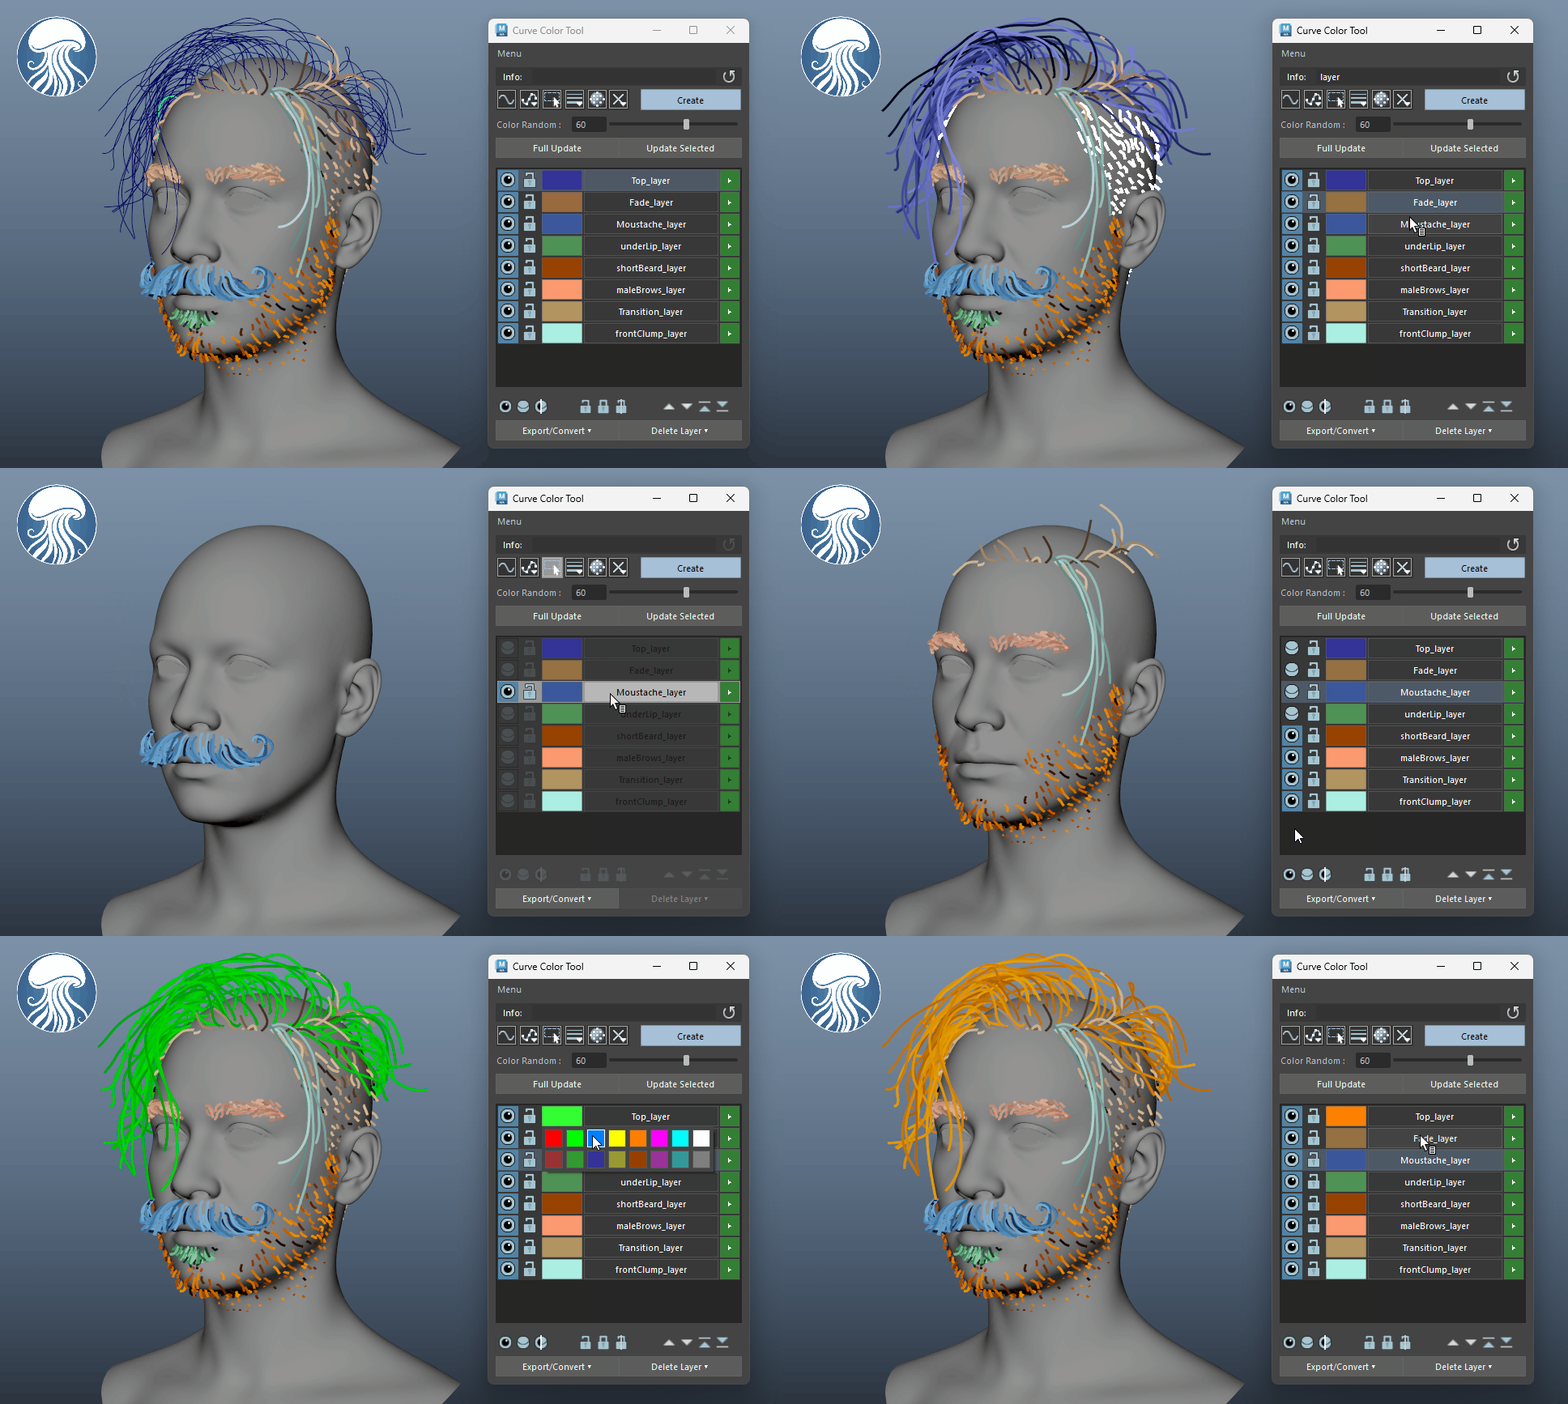
Groomer's Tool includes lots Maya utility tools to help with common Grooming needs
Curve Extract Tool
-
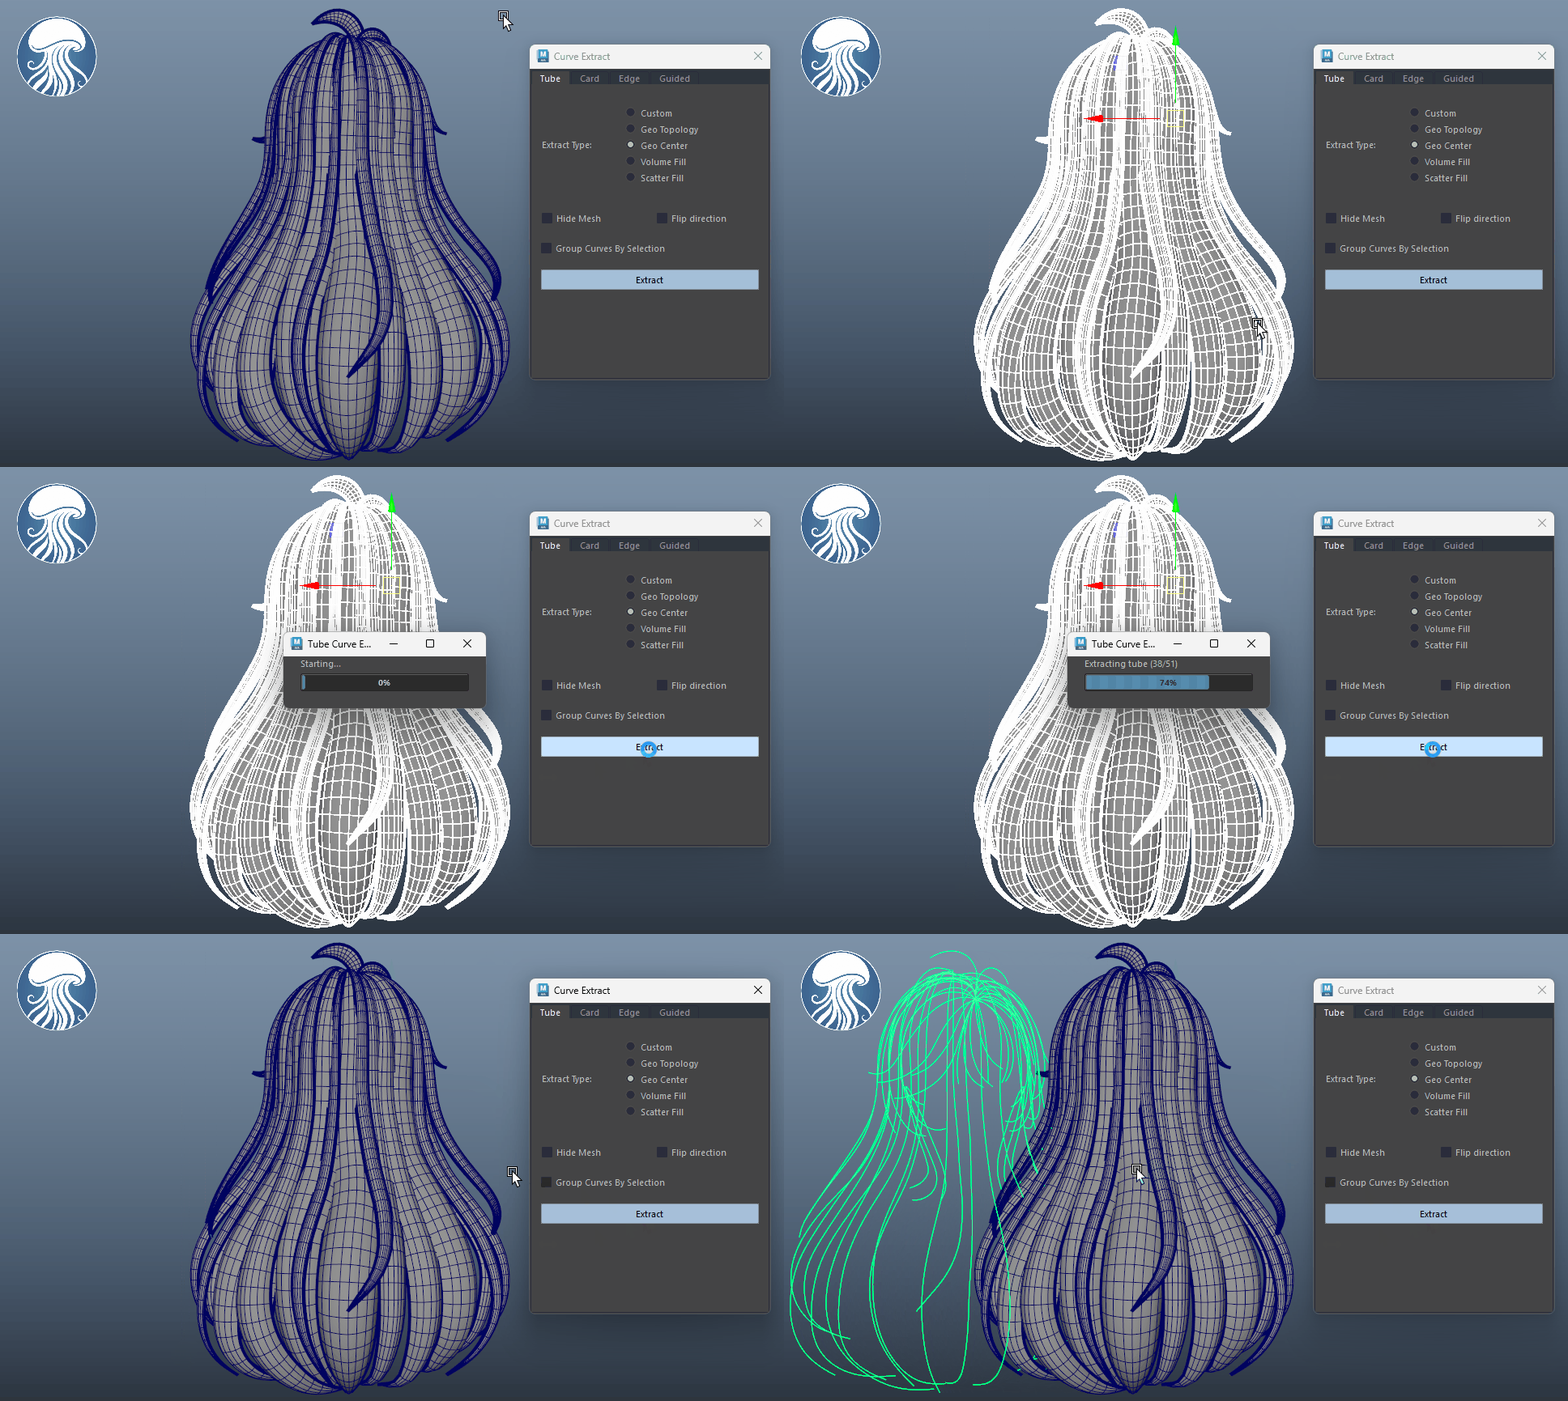
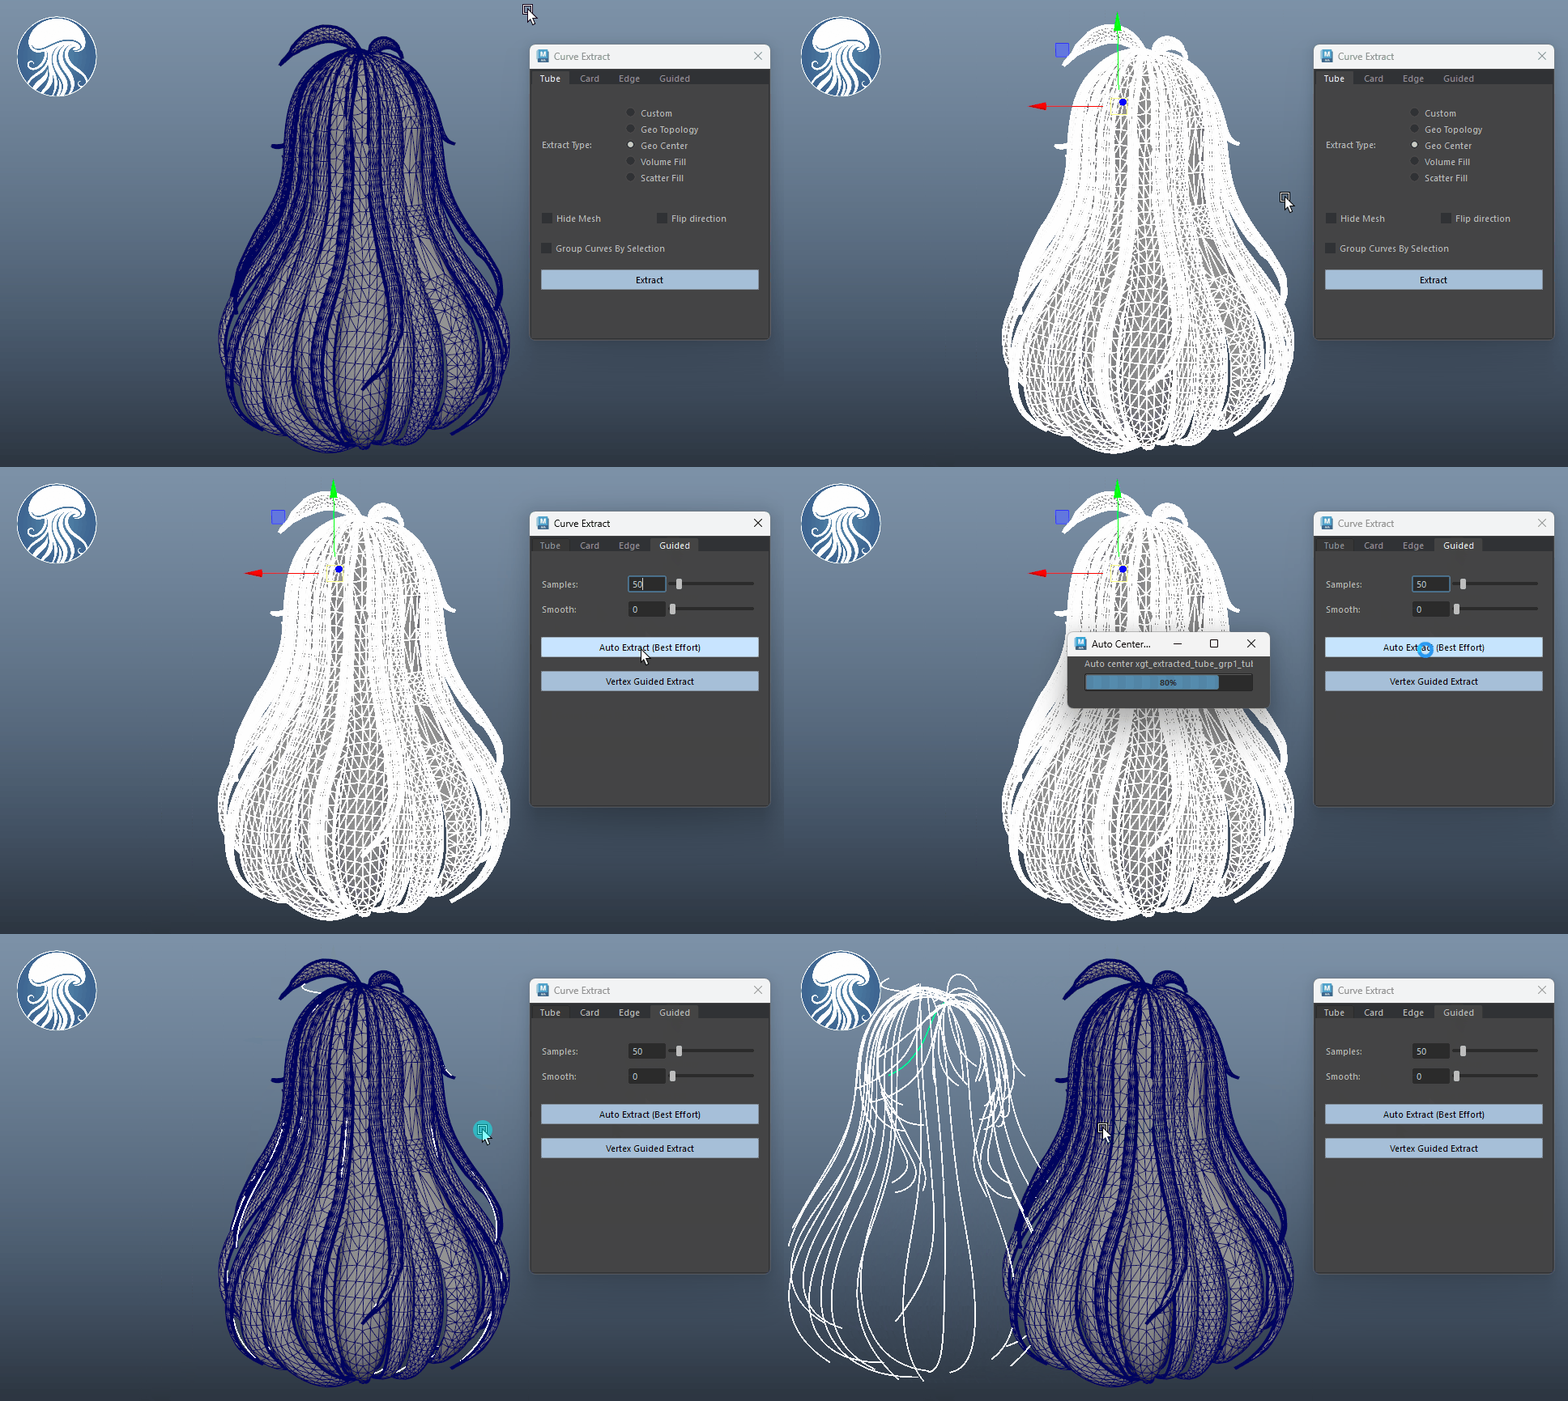
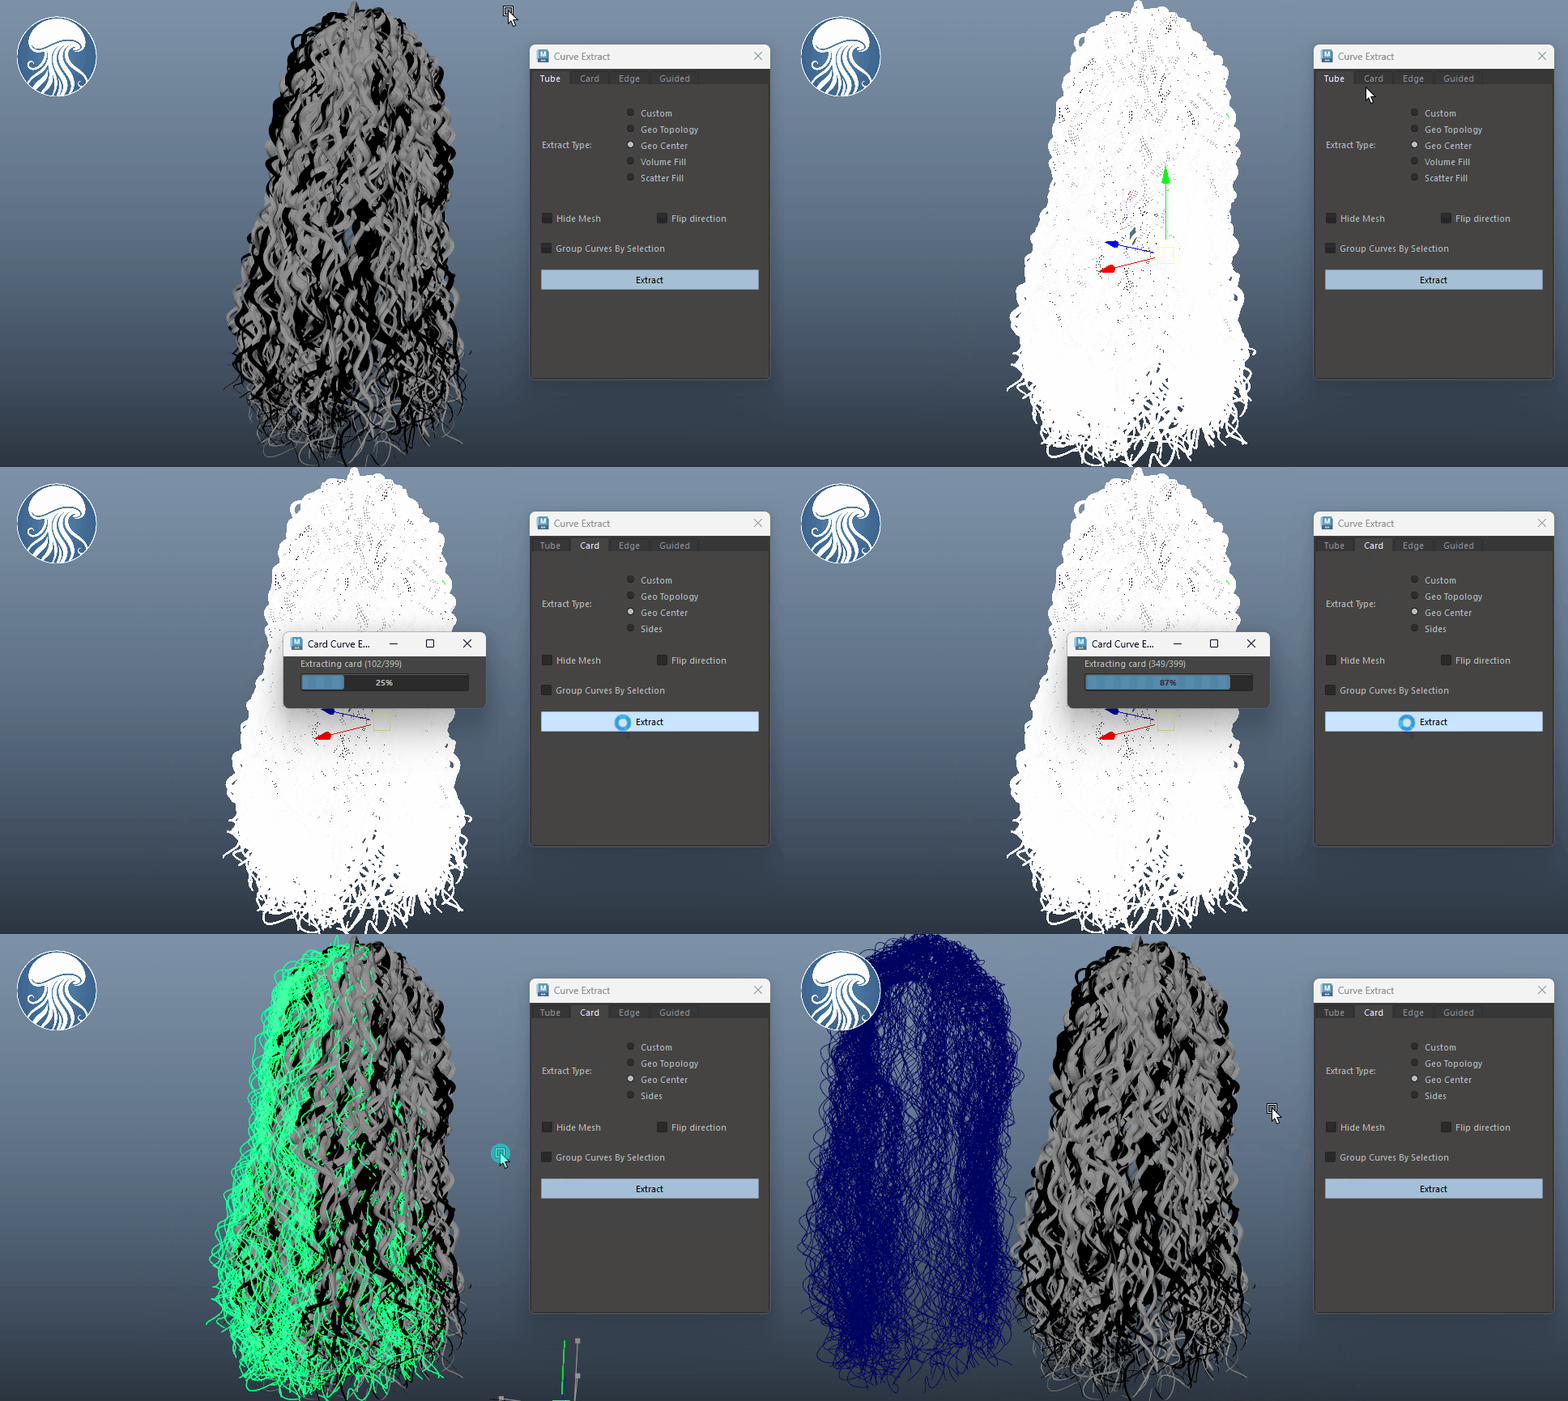
Tubes from ZBrush or imported Maya meshes are often used as hairstyle references, so extracting curves becomes a daily grooming task. Curve Extract Tool makes this fast and offer many options. You can extract a center curve from tube/card topology, fill or scatter a tube with curves, or extract directly from selected edges. All with a simple one button click.
-
And if your tubes/cards aren’t in a clean grid topology, the Poly Resolve Tool helps fix them so they become properly extractable.
Poly Resolve Tool
-
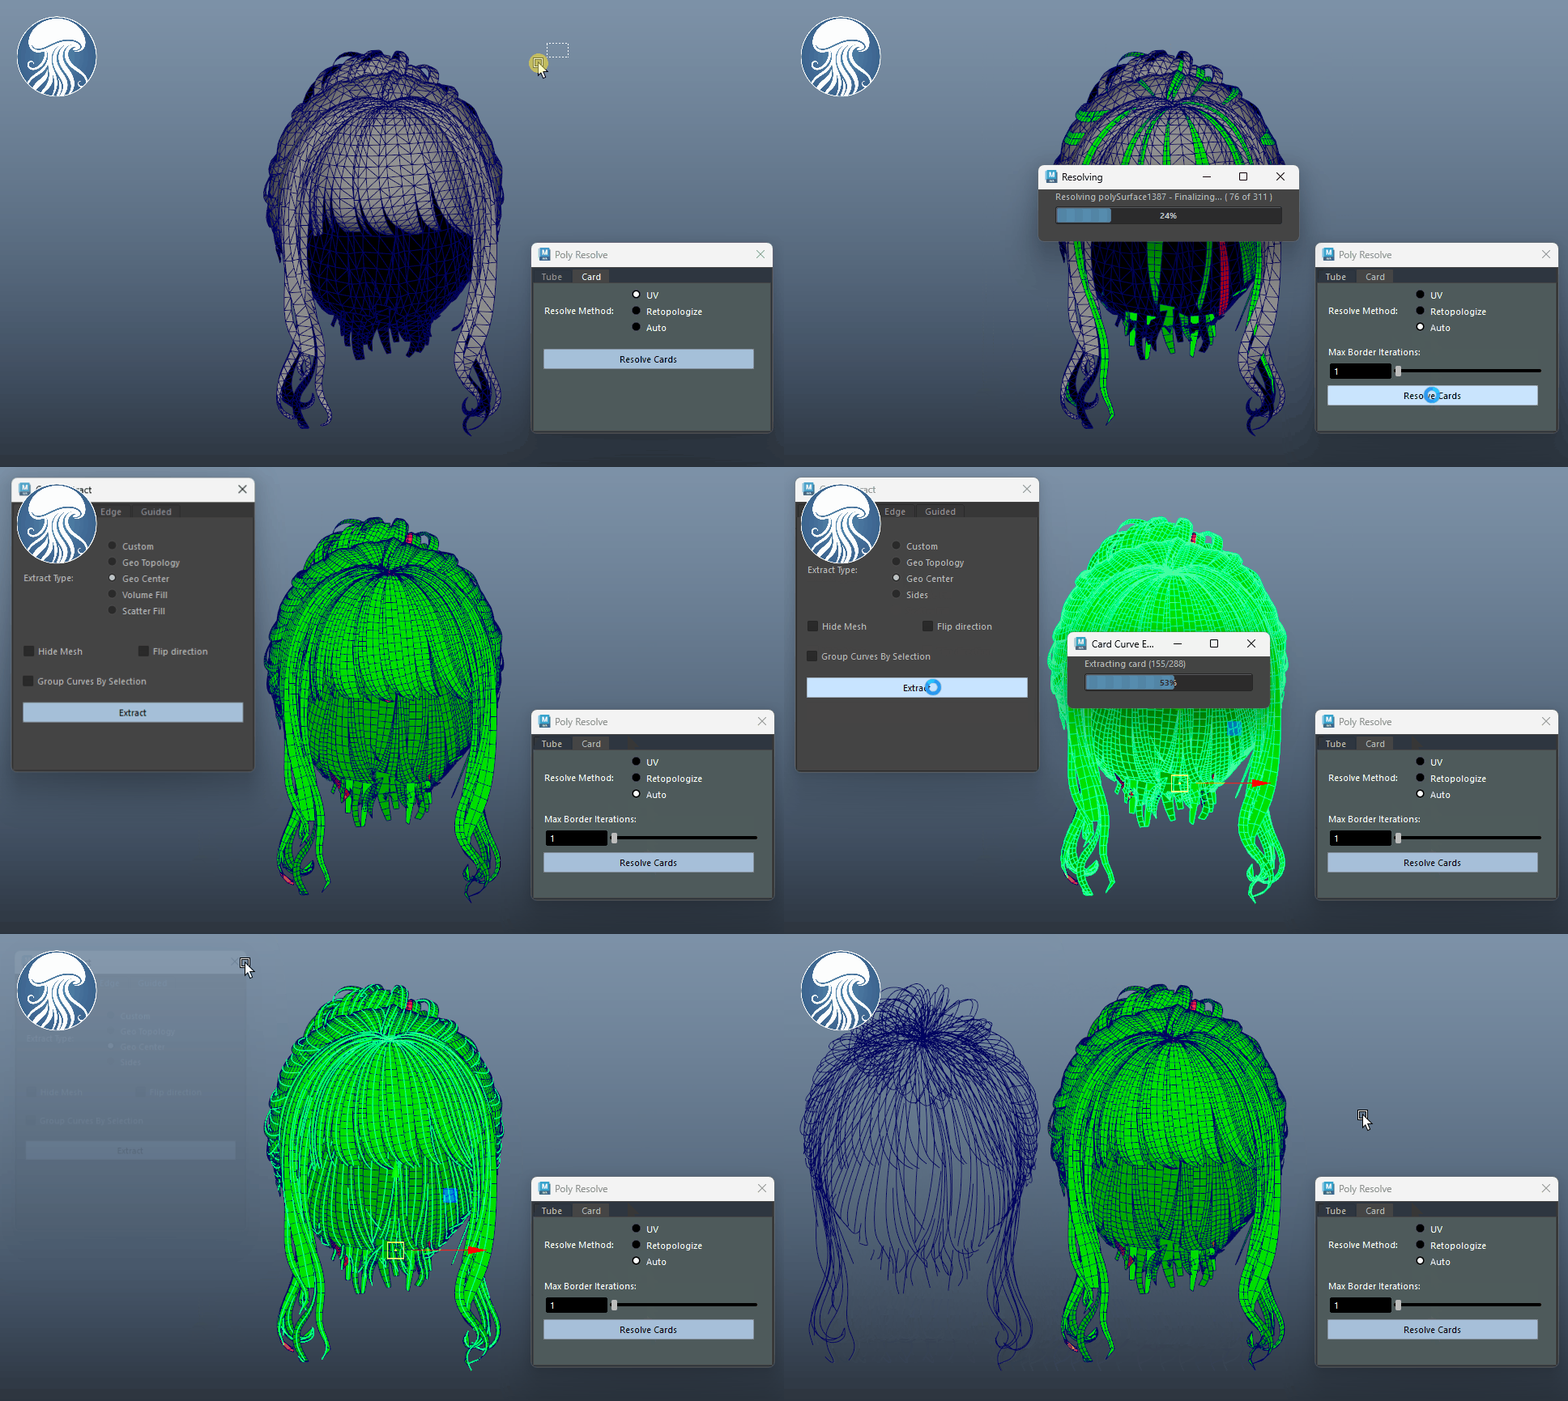
Poly Resolve is a companion tool that converts tube/card meshes into quad / grid-like topology so they become reliable for "curve extraction".
-
It’s a huge time-saver, take almost any exported card geometry, resolve it into extractable quads, then extract curves and use them directly in our Hair Card Builder.
Curve Fill Tool
-
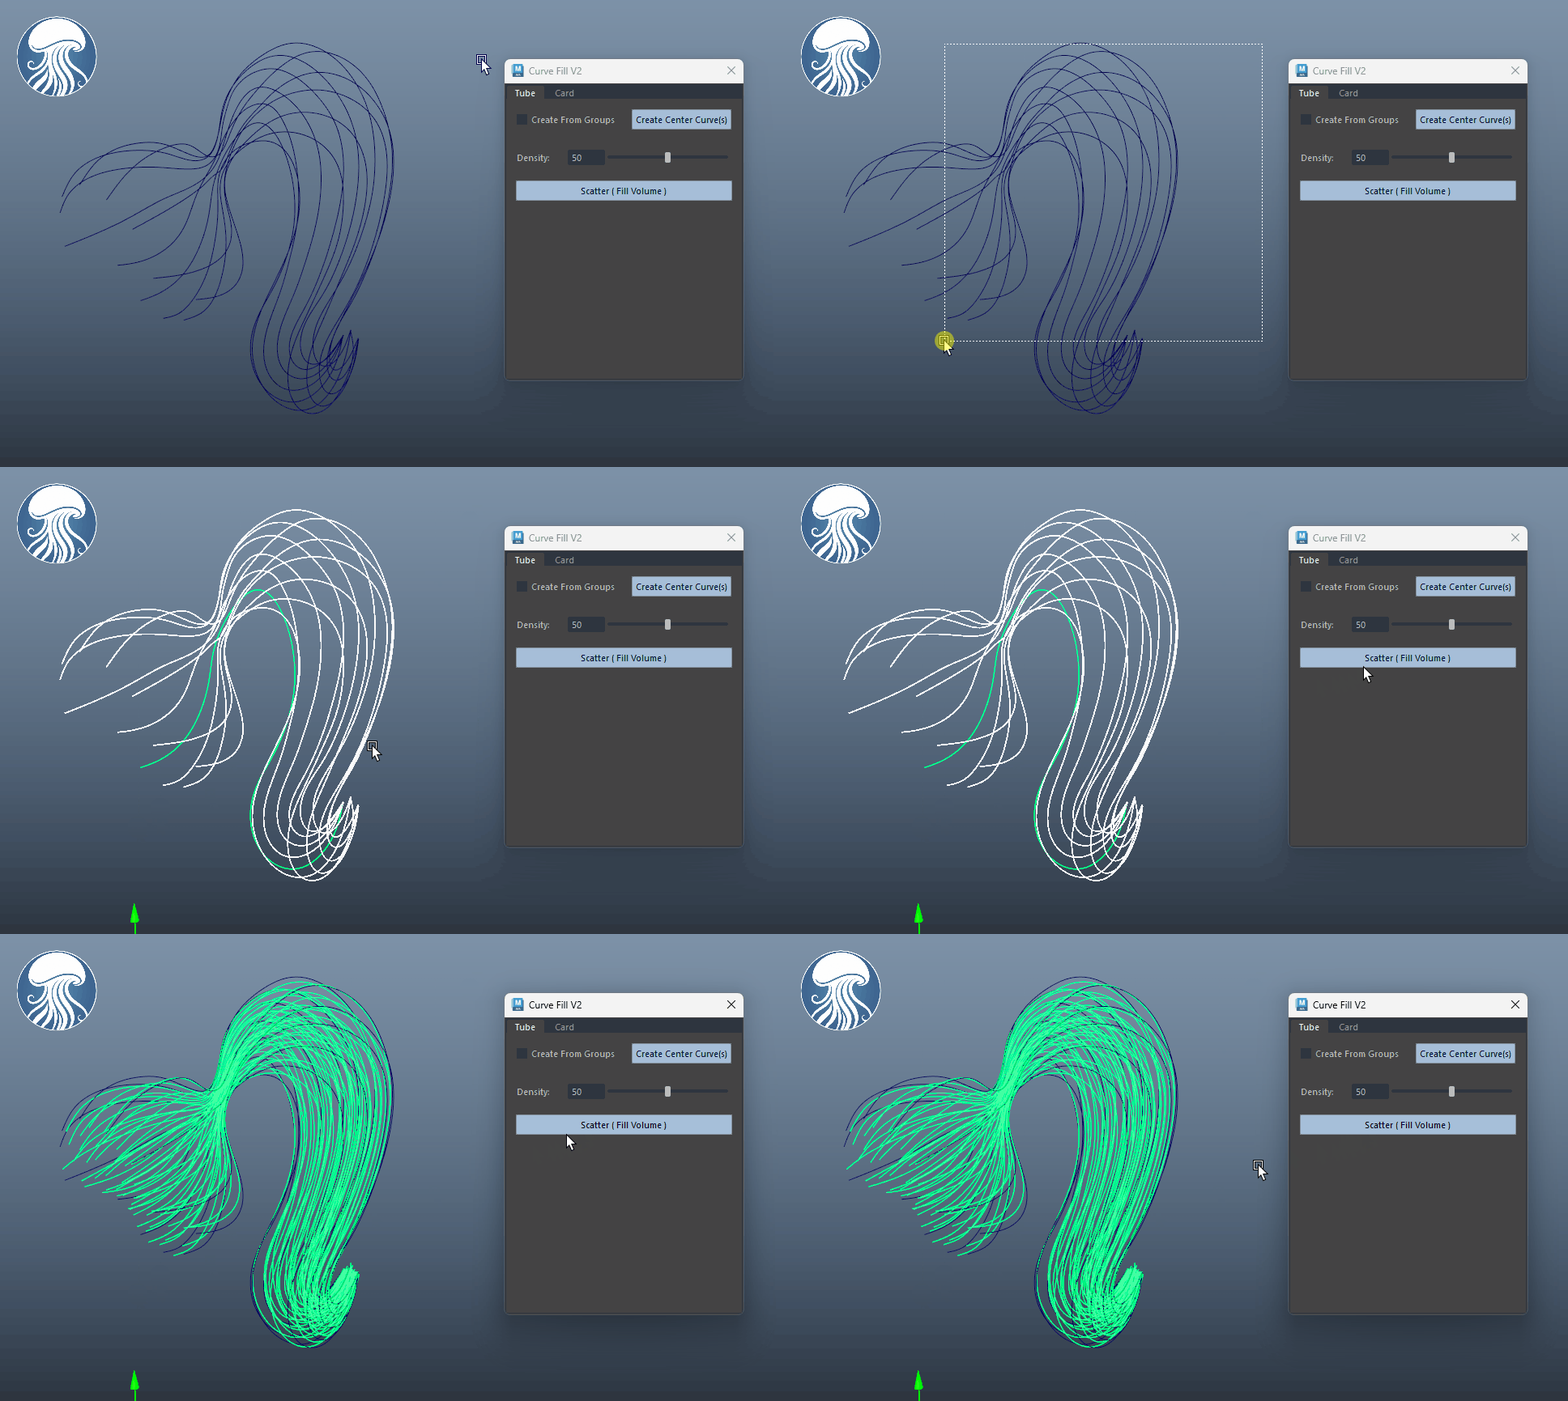
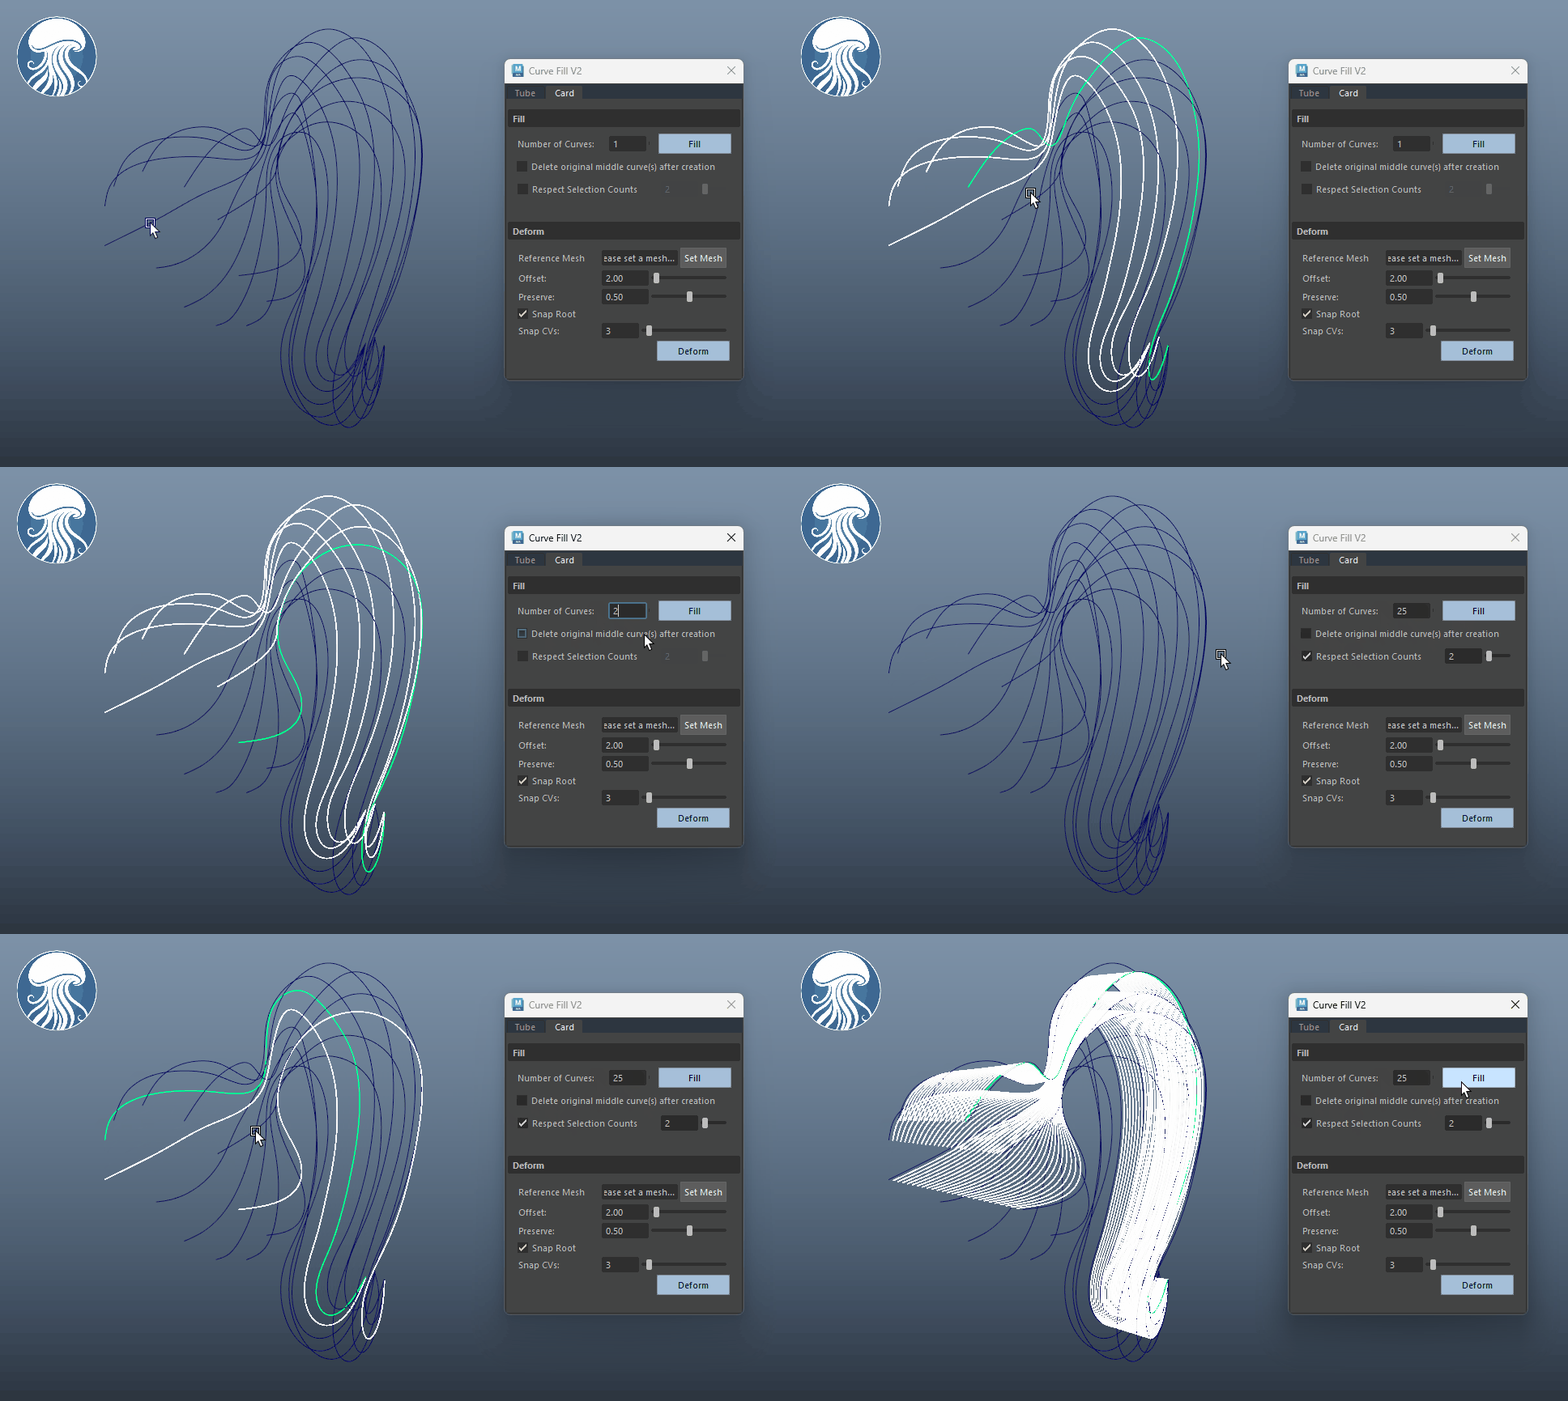
Have a bunch of curves with no geometry? Curve Fill can generate the in-between geometry for you. You have the option to either fill it in tube or card form. If you only need a center curve between curves, it can do that too.
-
A common workflow is: create your outer boundary curves first, then use Curve Fill to quickly “fill the voids” with in-between curves/geometry. If those new curves end up intersecting the mesh, you can clean them up with the Curve Trim Tool.
Curve Trim Tool
-
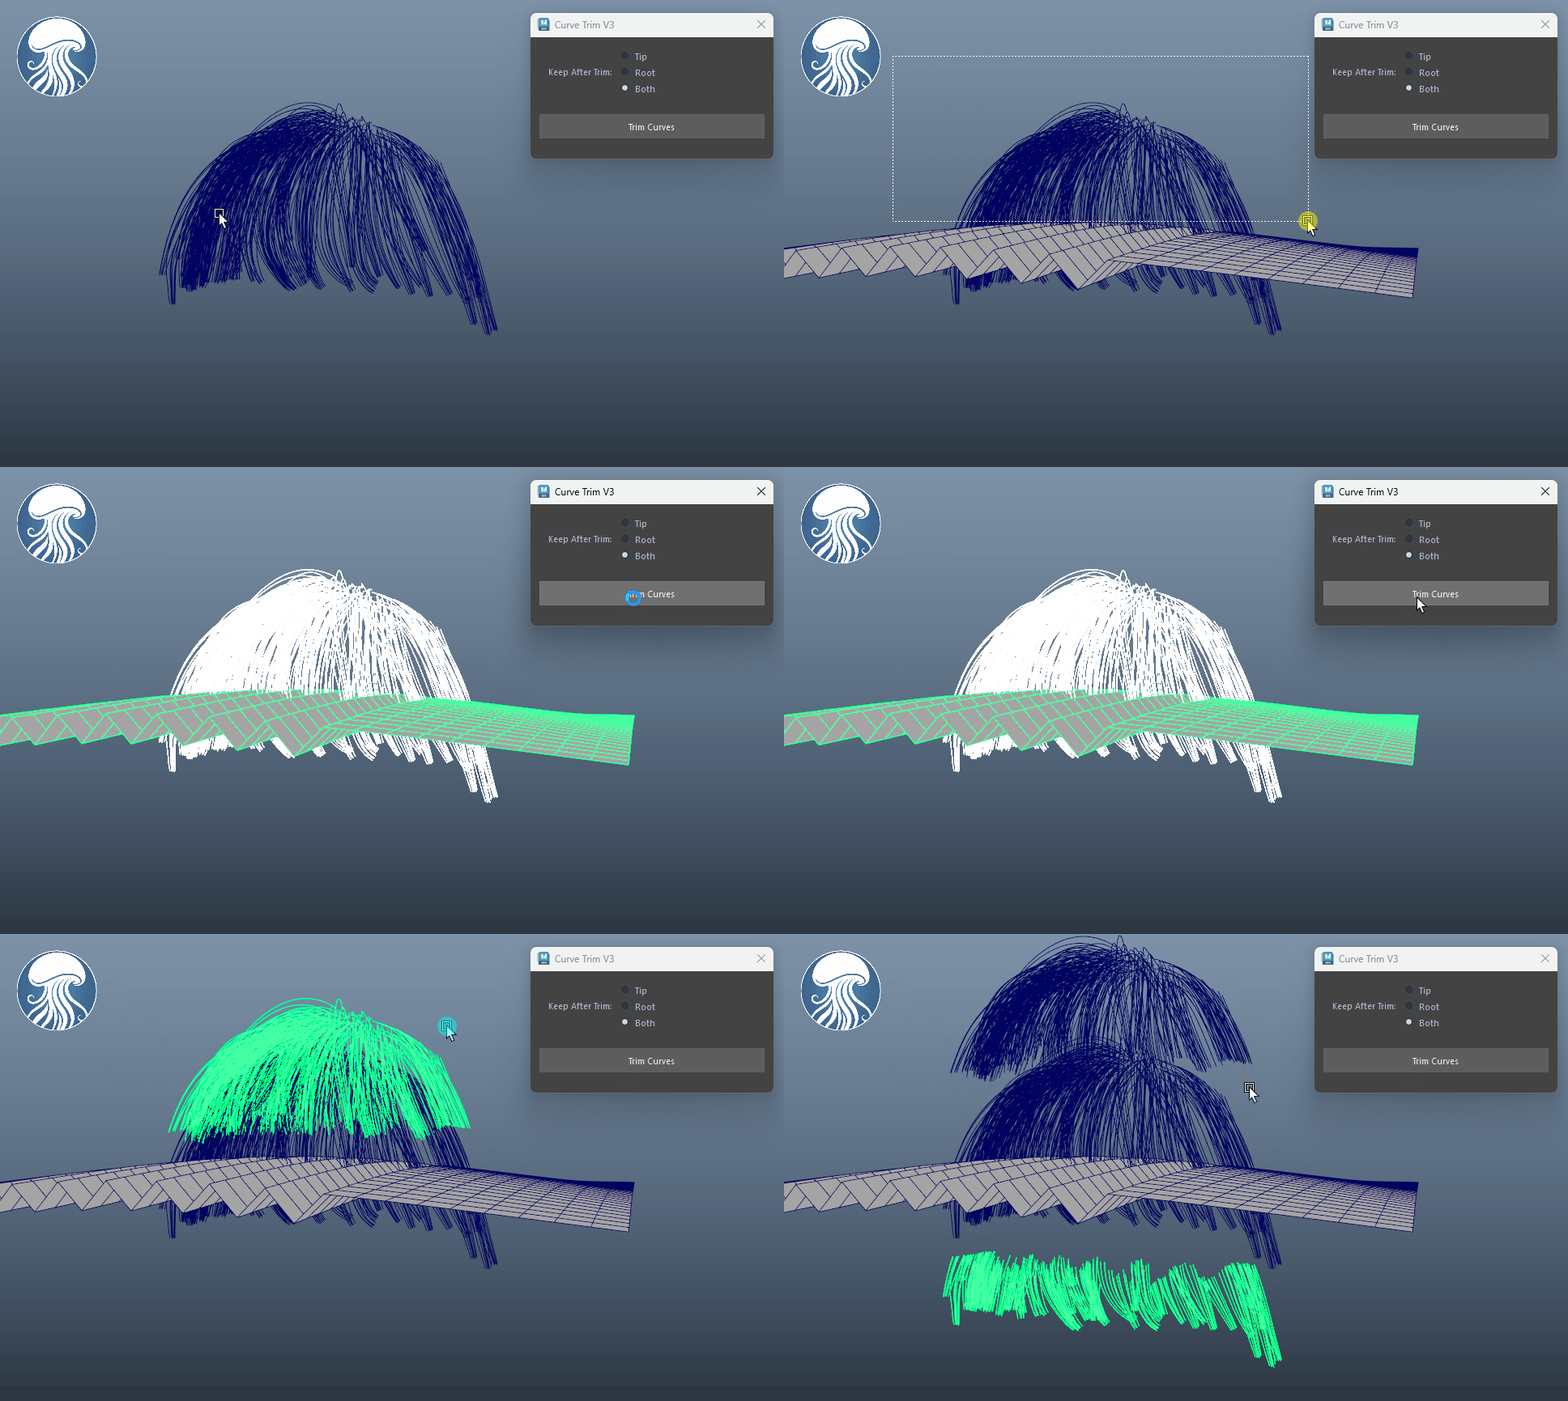
When curves are extracted from tubes/cards, they often intersect the underlying mesh. This tool trims away the unwanted sections, keeping the curve roots clean and properly seated on the mesh.

Curve Snap Tool
-
If your curves aren’t sitting on the mesh, this tool fixes it instantly.
-
It includes a falloff control plus multiple snapping options like snapping the entire curve, or snapping while preserving the root curvature for a cleaner, more natural result.
-
You also get two workflows:
-
Mesh based snap: snap to the selected mesh.
-
Interactive point snap: click directly on the mesh to snap curves to a specific point.
-
Curve Reuild (Distance)
-
Maya’s Rebuild Curve is CV count based, so rebuilding short and long curves together often gives uneven results. Short curves become overly dense, and long curves don’t have enough CVs to hold their shape.
-
Groomer’s Tool’s Curve Rebuild uses a distance-based method instead, keeping CV spacing consistent across curves of different lengths. It also includes a preview, so artists can check the CV distribution before applying.


Curve Smart Reverse
-
Curves often end up flipped, and manually finding which ones are reversed is a pain. Curve Smart Reverse fixes this with two quick methods:
-
Reference geometry mode: use a scalp mesh (or even a sphere) as a direction reference.
-
Tip selection mode: pick the tip vertices on the curves you want to define as “end.”
-
-
After that, the tool automatically detects and reverses the curves as needed.
Curve Clump/Repel
-
This tool lets you clump or repel multiple curves either from their shared center or from the last selected curve, with a falloff ramp to control how the effect fades along the curve.
-
If you add new curves later, you can quickly snap them toward the last selected curve so everything lines up and “flows” together. This is especially useful for guiding curves into directions, or pulling curves away from existing strands like side flow into braids.


Paint FX Tool to Curves
-
Want to “paint” curves onto a mesh? Groomer’s Tool’s Paint FX Tool lets you paint directly on a surface, then automatically converts the Paint FX strokes into clean Maya curves.
-
Afterward, you can also push the curve tips outward toward a volume mesh with a built-in volume mesh tool. It is great for blocking out a first pass of curves towards your fur-like grooming.
Curve Toolkit
-
Groomer’s Tool comes with a full Maya Curve package, but if you need more day-to-day helpers, we also include a Curve Toolkit that gathers common, time-saving functions in one place.
-
It covers things like batch tweak mode, percentage-based random selection, CV selection shortcuts, and a wide range of curve utilities such as normalize, smooth, rebuild, average, set length, mirror, distance checks, and more. All designed to speed up everyday grooming work.

Groomer's Tool is one of the very few package that provides tools for XGen. Below are some of our most popular tools.
XGen Guide Color
-
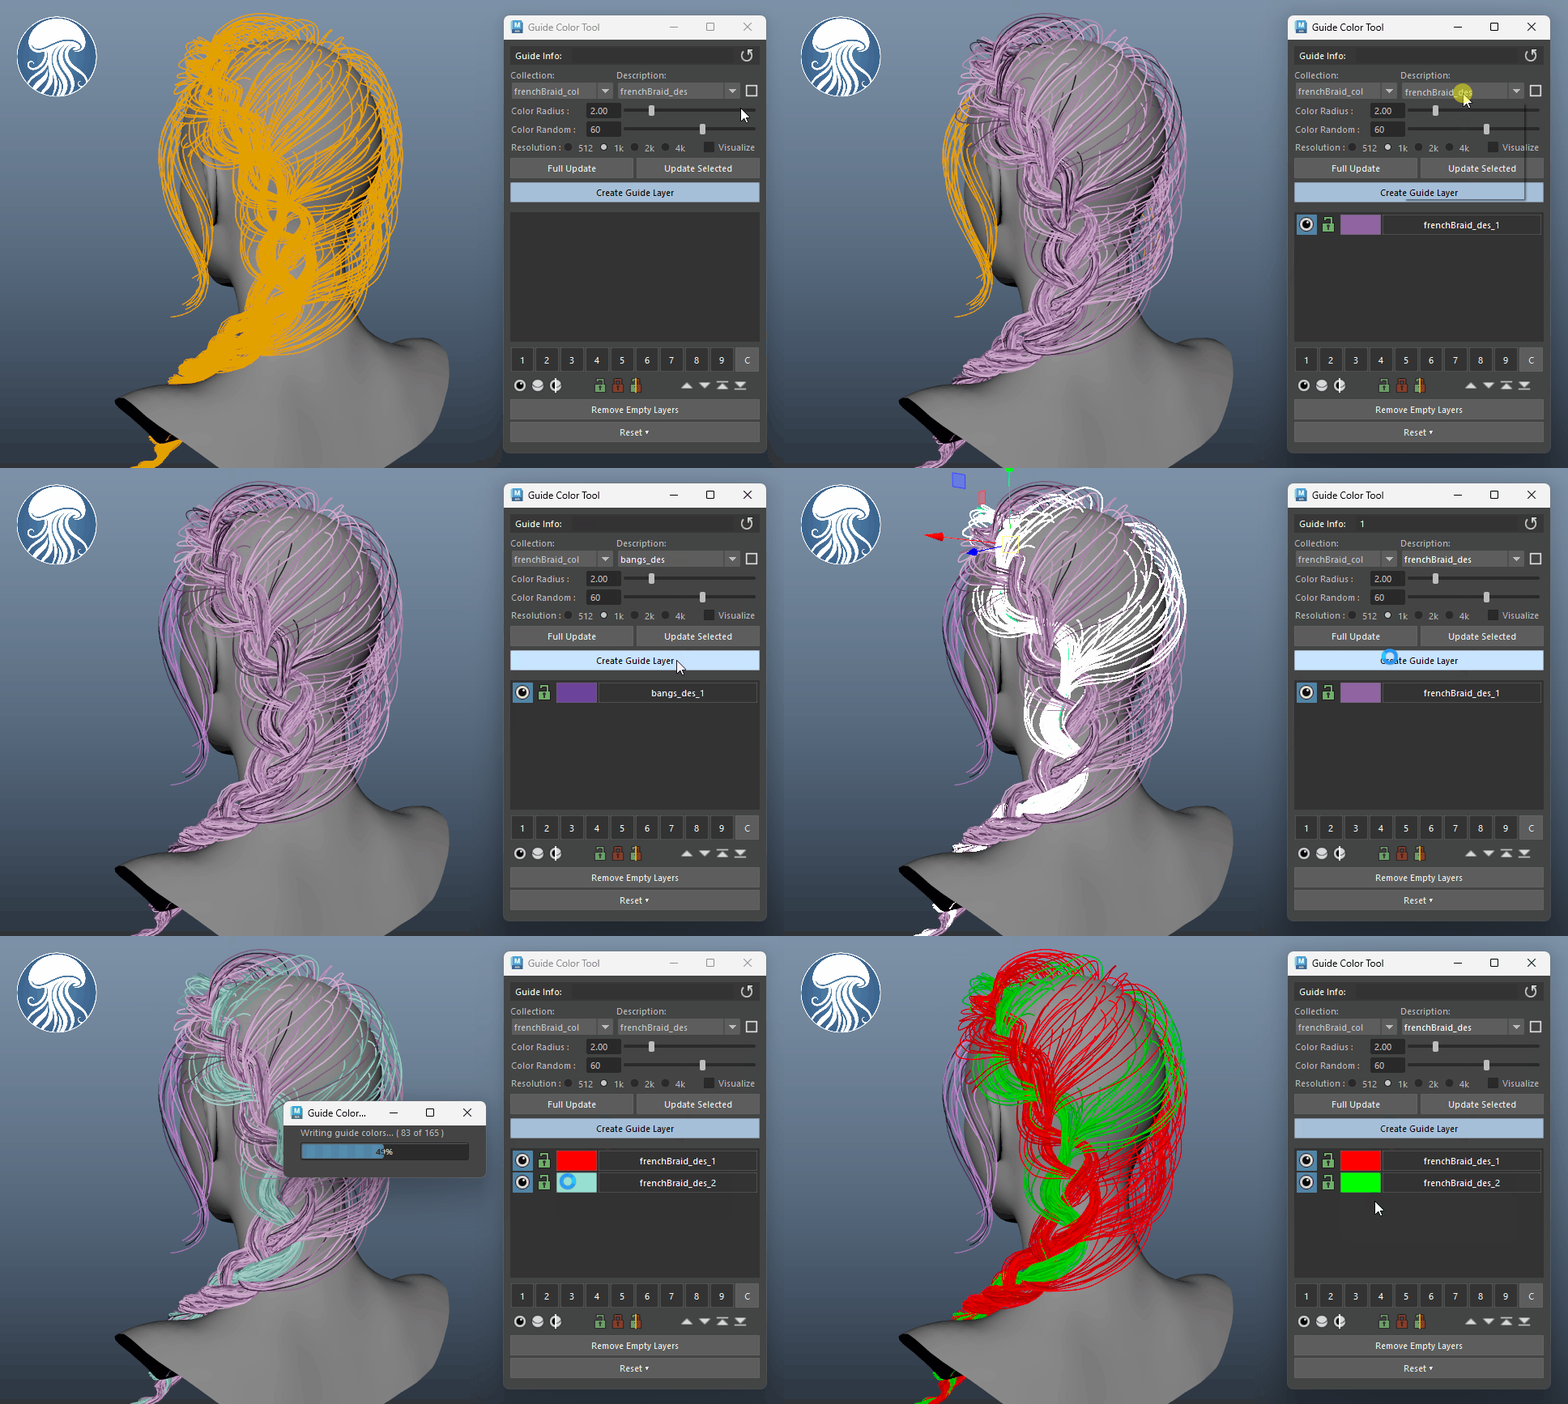
XGen guides are always orange, and in dense grooms it can be hard on the eyes to spot and select the right ones. Instead of manually painting and repainting PTEX color maps, Groomer’s Tool provides a automatic, layer-based, guide color system.
-
You can assign colors to selected guides, toggle layers on/off, isolate them, and group layers into sets, making it much easier to organize, navigate, and keep complex XGen scenes tidy.
XGen Multi-Clump Bake
-
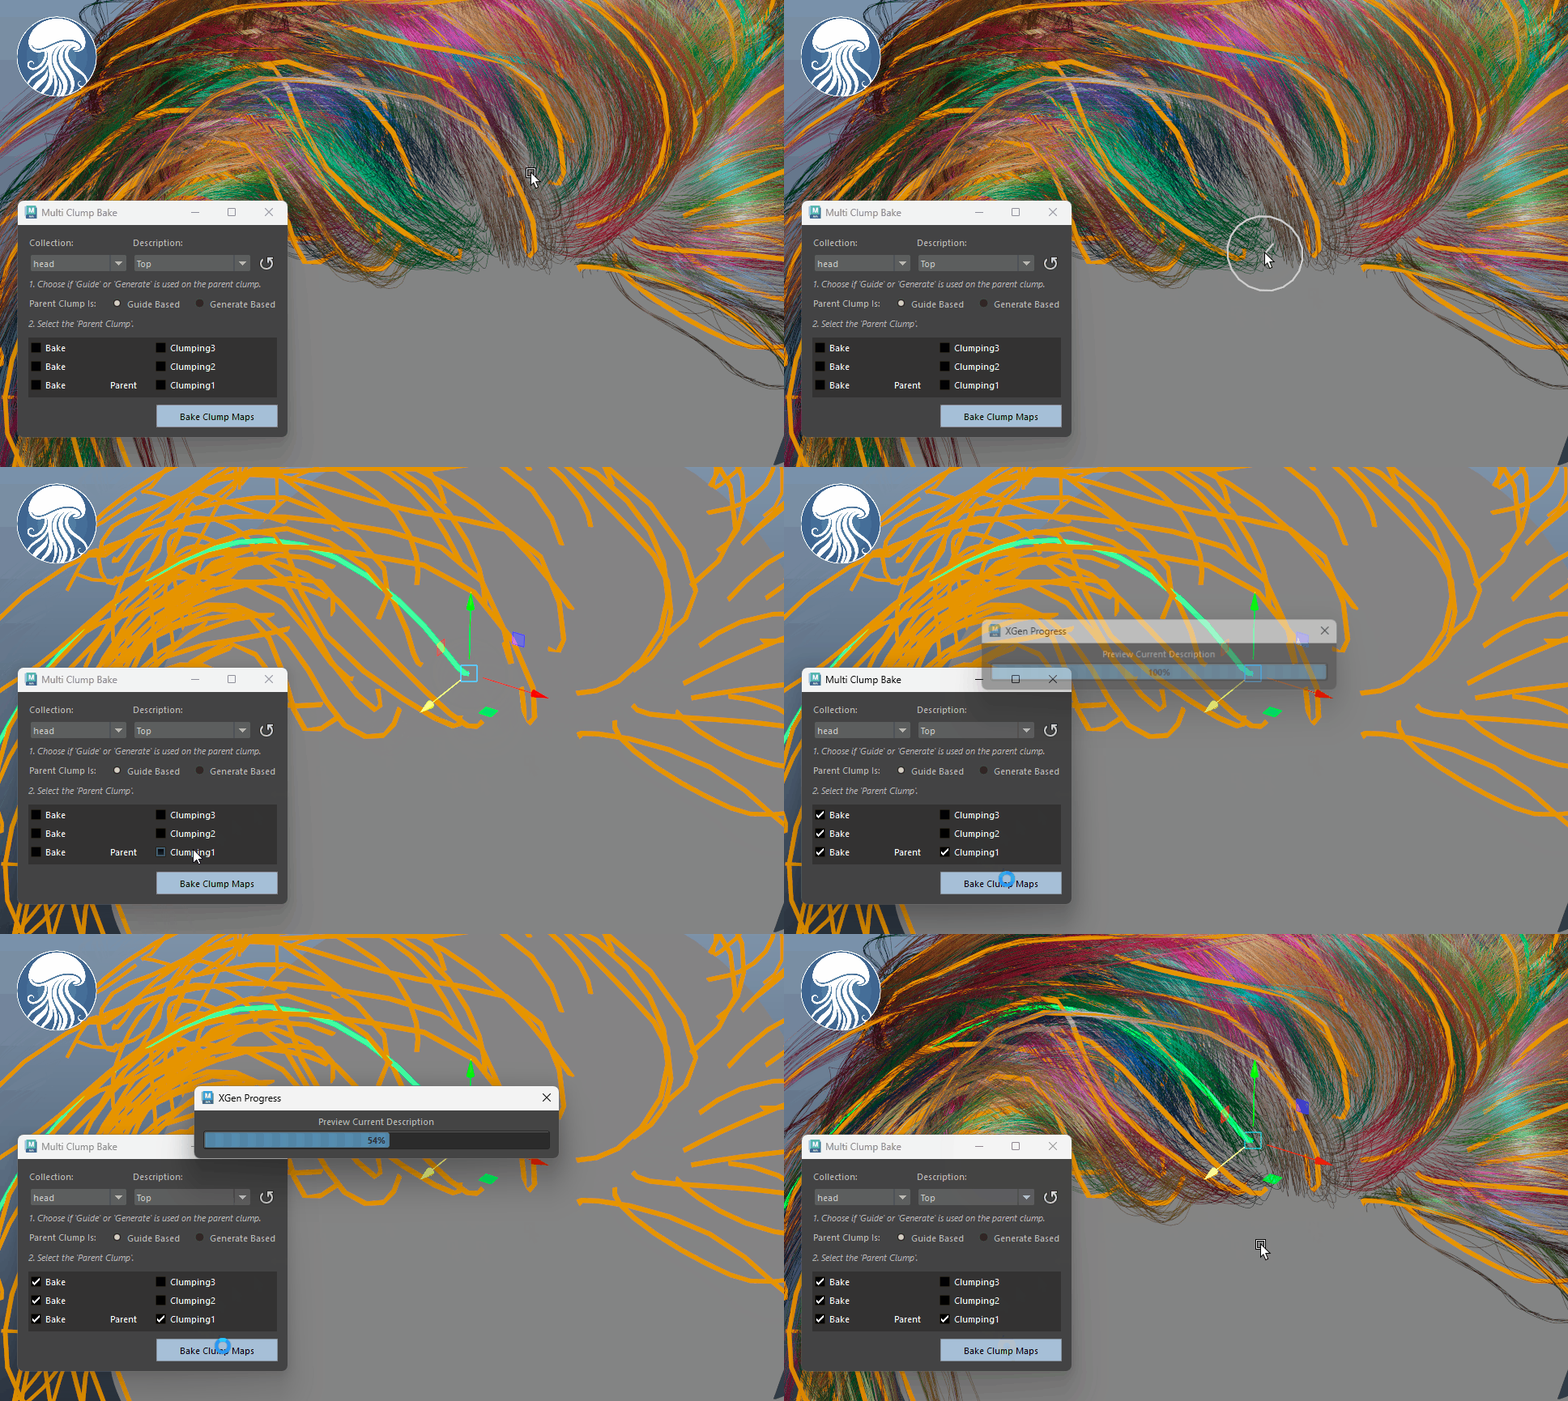
When you add or remove guides, Clump modifiers often need a re-bake to update properly. Instead of opening each clump modifier and baking them one by one, Groomer’s Tool lets you re-bake all clump maps for a chosen description with a single click.
XGen PTEX Viewer
-
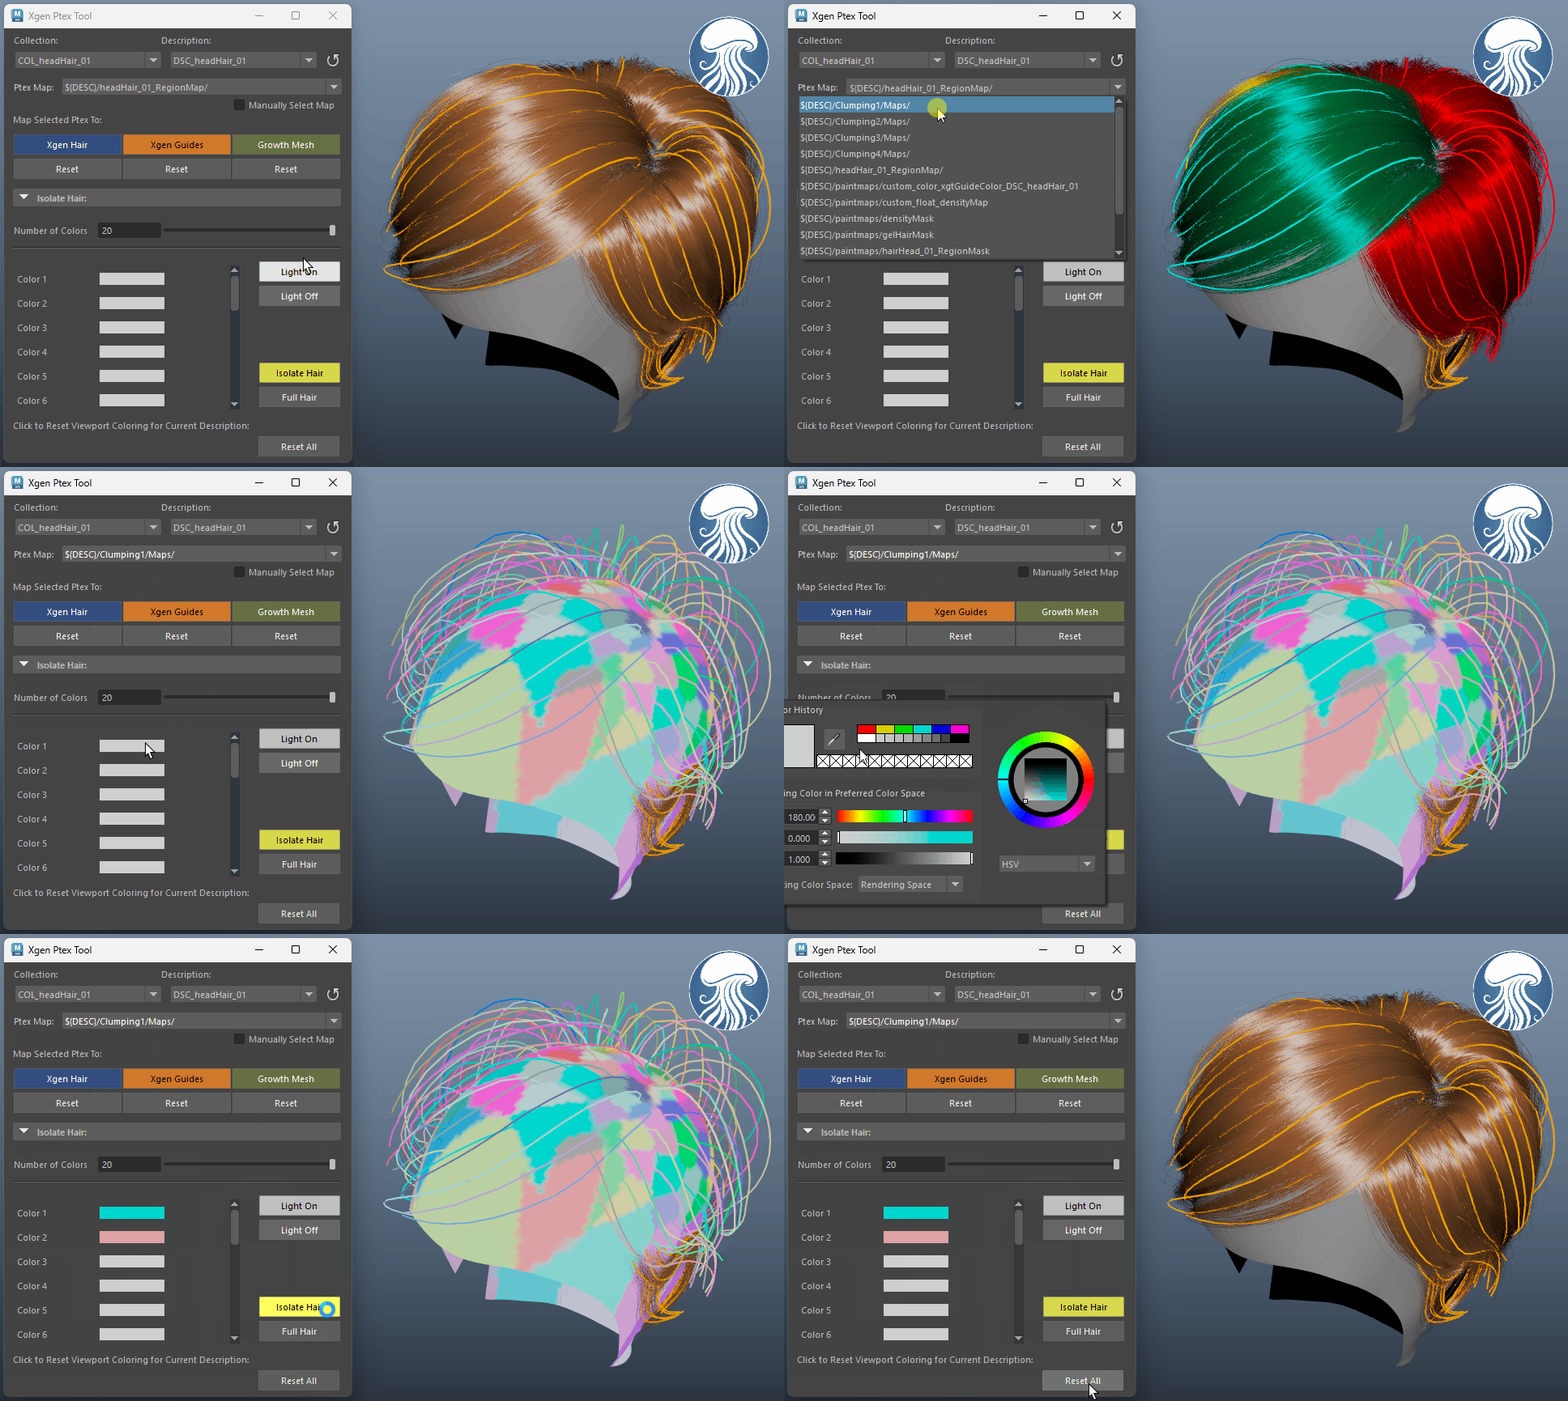
Want to see what your PTEX maps are actually doing in XGen? This tool lets you preview any .ptex directly on the scalp/growth mesh, guides, or the generated primitives.
-
It also includes an Isolator so you can isolate a region of primitives and inspect specific areas in detail when troubleshooting or polishing.
XGen Auto Switch
-
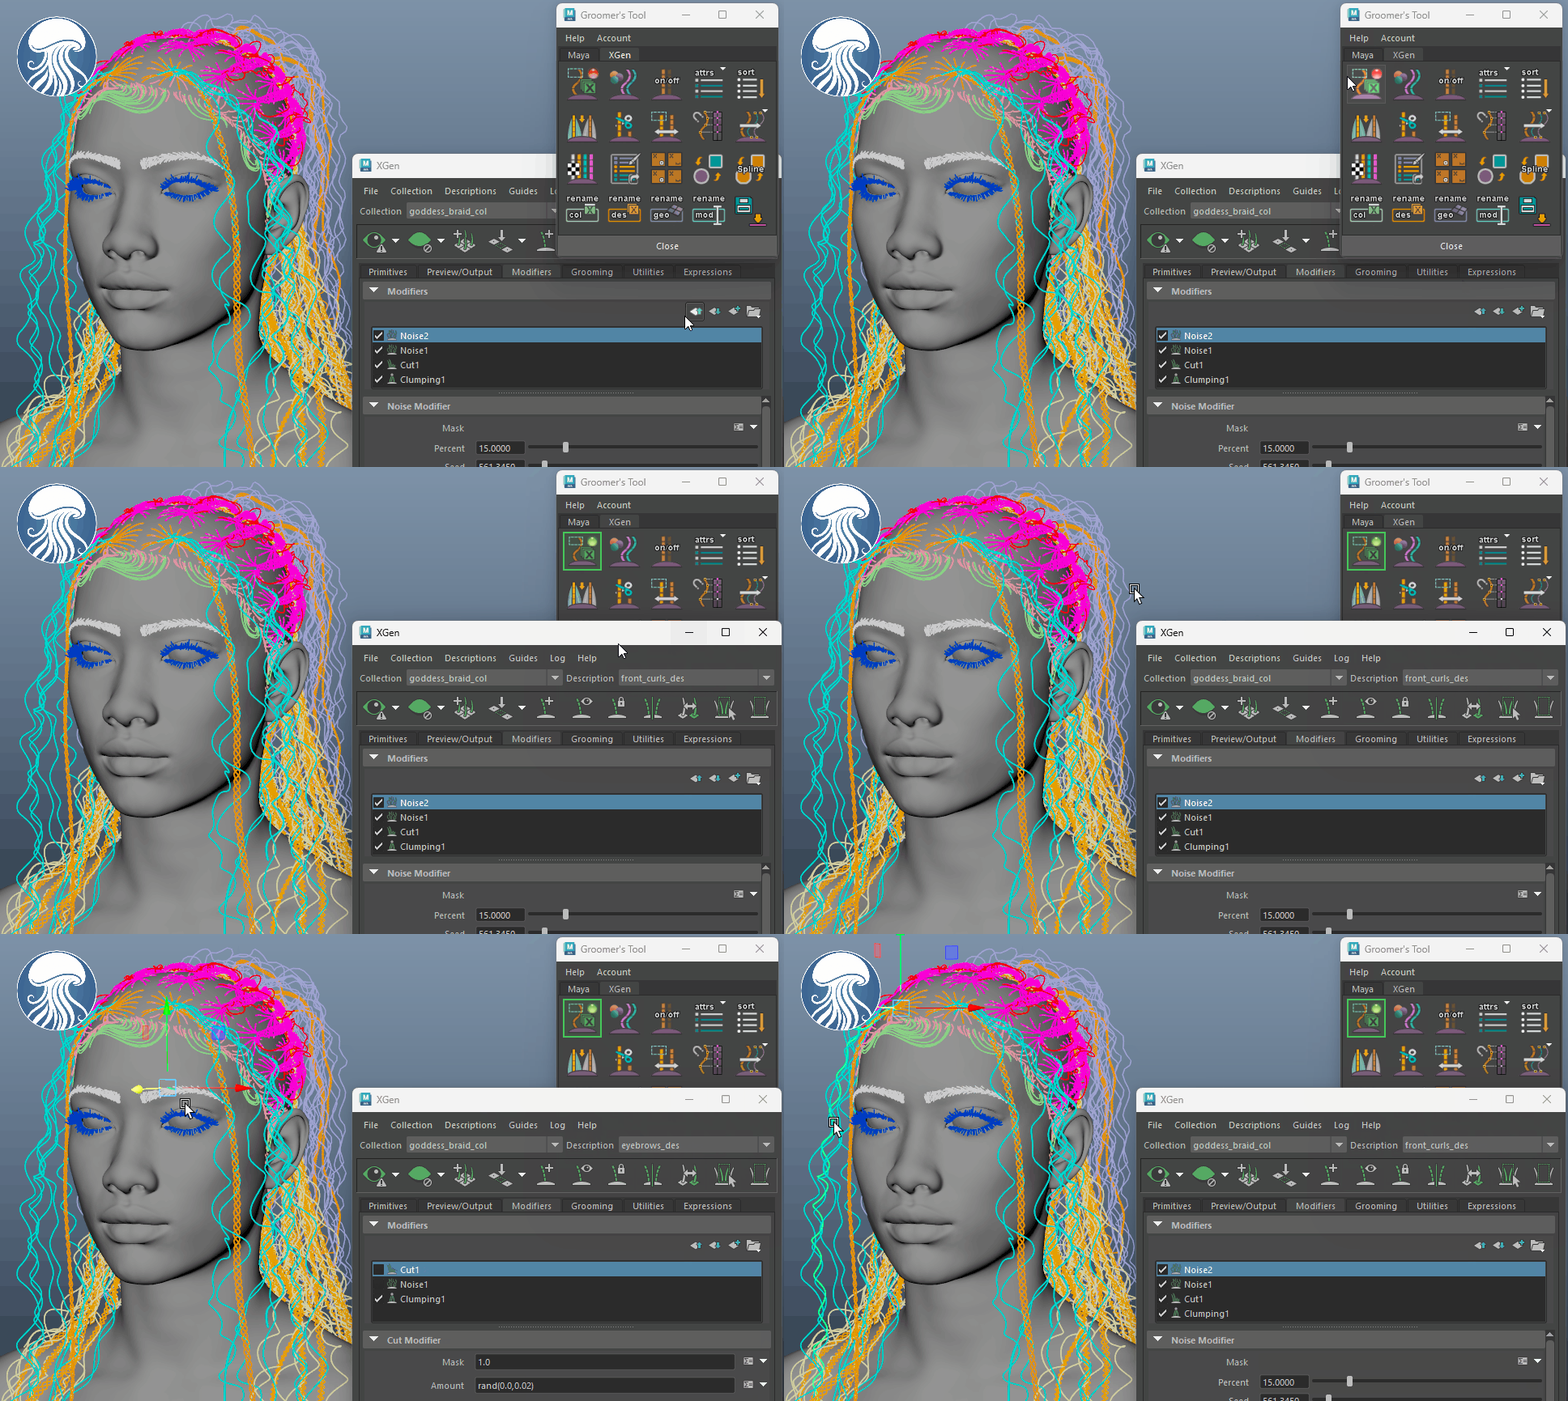
In complex XGen scenes, switching between descriptions can get slow when you’re constantly hunting through long dropdown lists.
-
With XGen Auto Description Switch, you simply select a guide in the viewport, and the tool automatically switches to the correct description for you. It's fast, direct, and requires no menu digging.


XGen Attribute Tools
-
Groomer’s Tool includes utilities for editing XGen shading parameters, description attributes, and modifier settings in bulk.
-
So if you need to boost density by 10%, add or tweak a shader parameter across many descriptions, or match modifier values between setups, you don’t have to open and edit each description/modifier one by one . You can apply consistent changes across the selection quickly and reliably.
XGen Renaming Tools
-
Groomer’s Tool lets you rename XGen Collections, Descriptions, and the Scalp/Growth mesh, while keeping all the important XGen links and connections intact after the rename.
-
For extra safety, we also provide a tool to backup your entire XGen setup, so you can restore the full scene if anything goes wrong.
