
XGEN DEEP BACKUP

|
The Deep Backup Tool is created to allow users to roll back to a previous Xgen scene with the associated files at the time of backup. You might ask, well, why do we need this? What’s the difference between just saving my Maya scene and opening a previous version? There are couple reasons for existence of this tool:
|
|
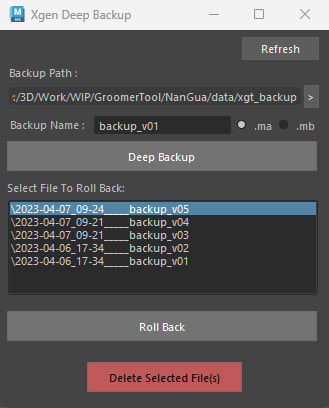
To correctly use the deep backup tool:
- Make sure to have a Maya saved first
- Enter a deep back up folder name and select either .ma or .mb
- Click on Deep Backup. The Deep Backup Tool will create a backup folder each time you click ‘Deep Backup'. The default folder can be found in your MayaProject/data/xgt_backup folder.
- You can also set the backup path to a different directory by clicking on the > key.
In each backup folder, it contains:
When you do a deep backup, these items are copied and moved over to the backup folder, and they will be put into a ‘dated’ folder, to avoid overwrites.
- entire xgen collections folder
- 3dPaintTextures folder
- .ma/.mb) file
- .xgen file
When you do a deep backup, these items are copied and moved over to the backup folder, and they will be put into a ‘dated’ folder, to avoid overwrites.
5. To roll back a version, simply click on one of the file on the list, and click “Roll Back”. Here I currently have a scene with modifier renamed
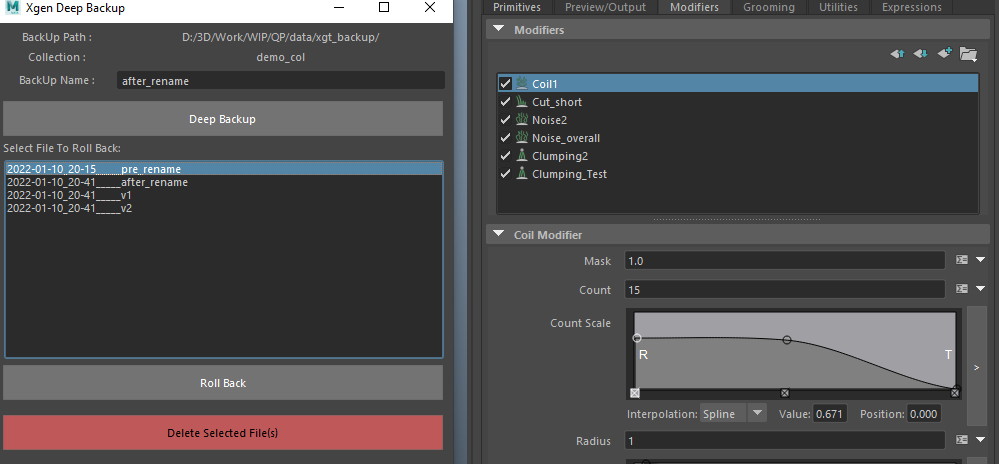
6. It will ask if you want to replace the ‘current’ collection folder with the backup.

Now, something to take note of when you want to ‘Roll Back’ to a previous backup folder.
- Each roll backs will make yet, another copy of your 'current' xgen and 3dPaintTextures folder, and store it in backupPath\xgt_temp\original. If there is any issue, you can go to this folder and make manual copy/paste if necessary. If everything works fine after a roll back, you can simply remove these extra folders.
